Tag Archives: Ralph’s Bay

Mount Nelson Signal Station

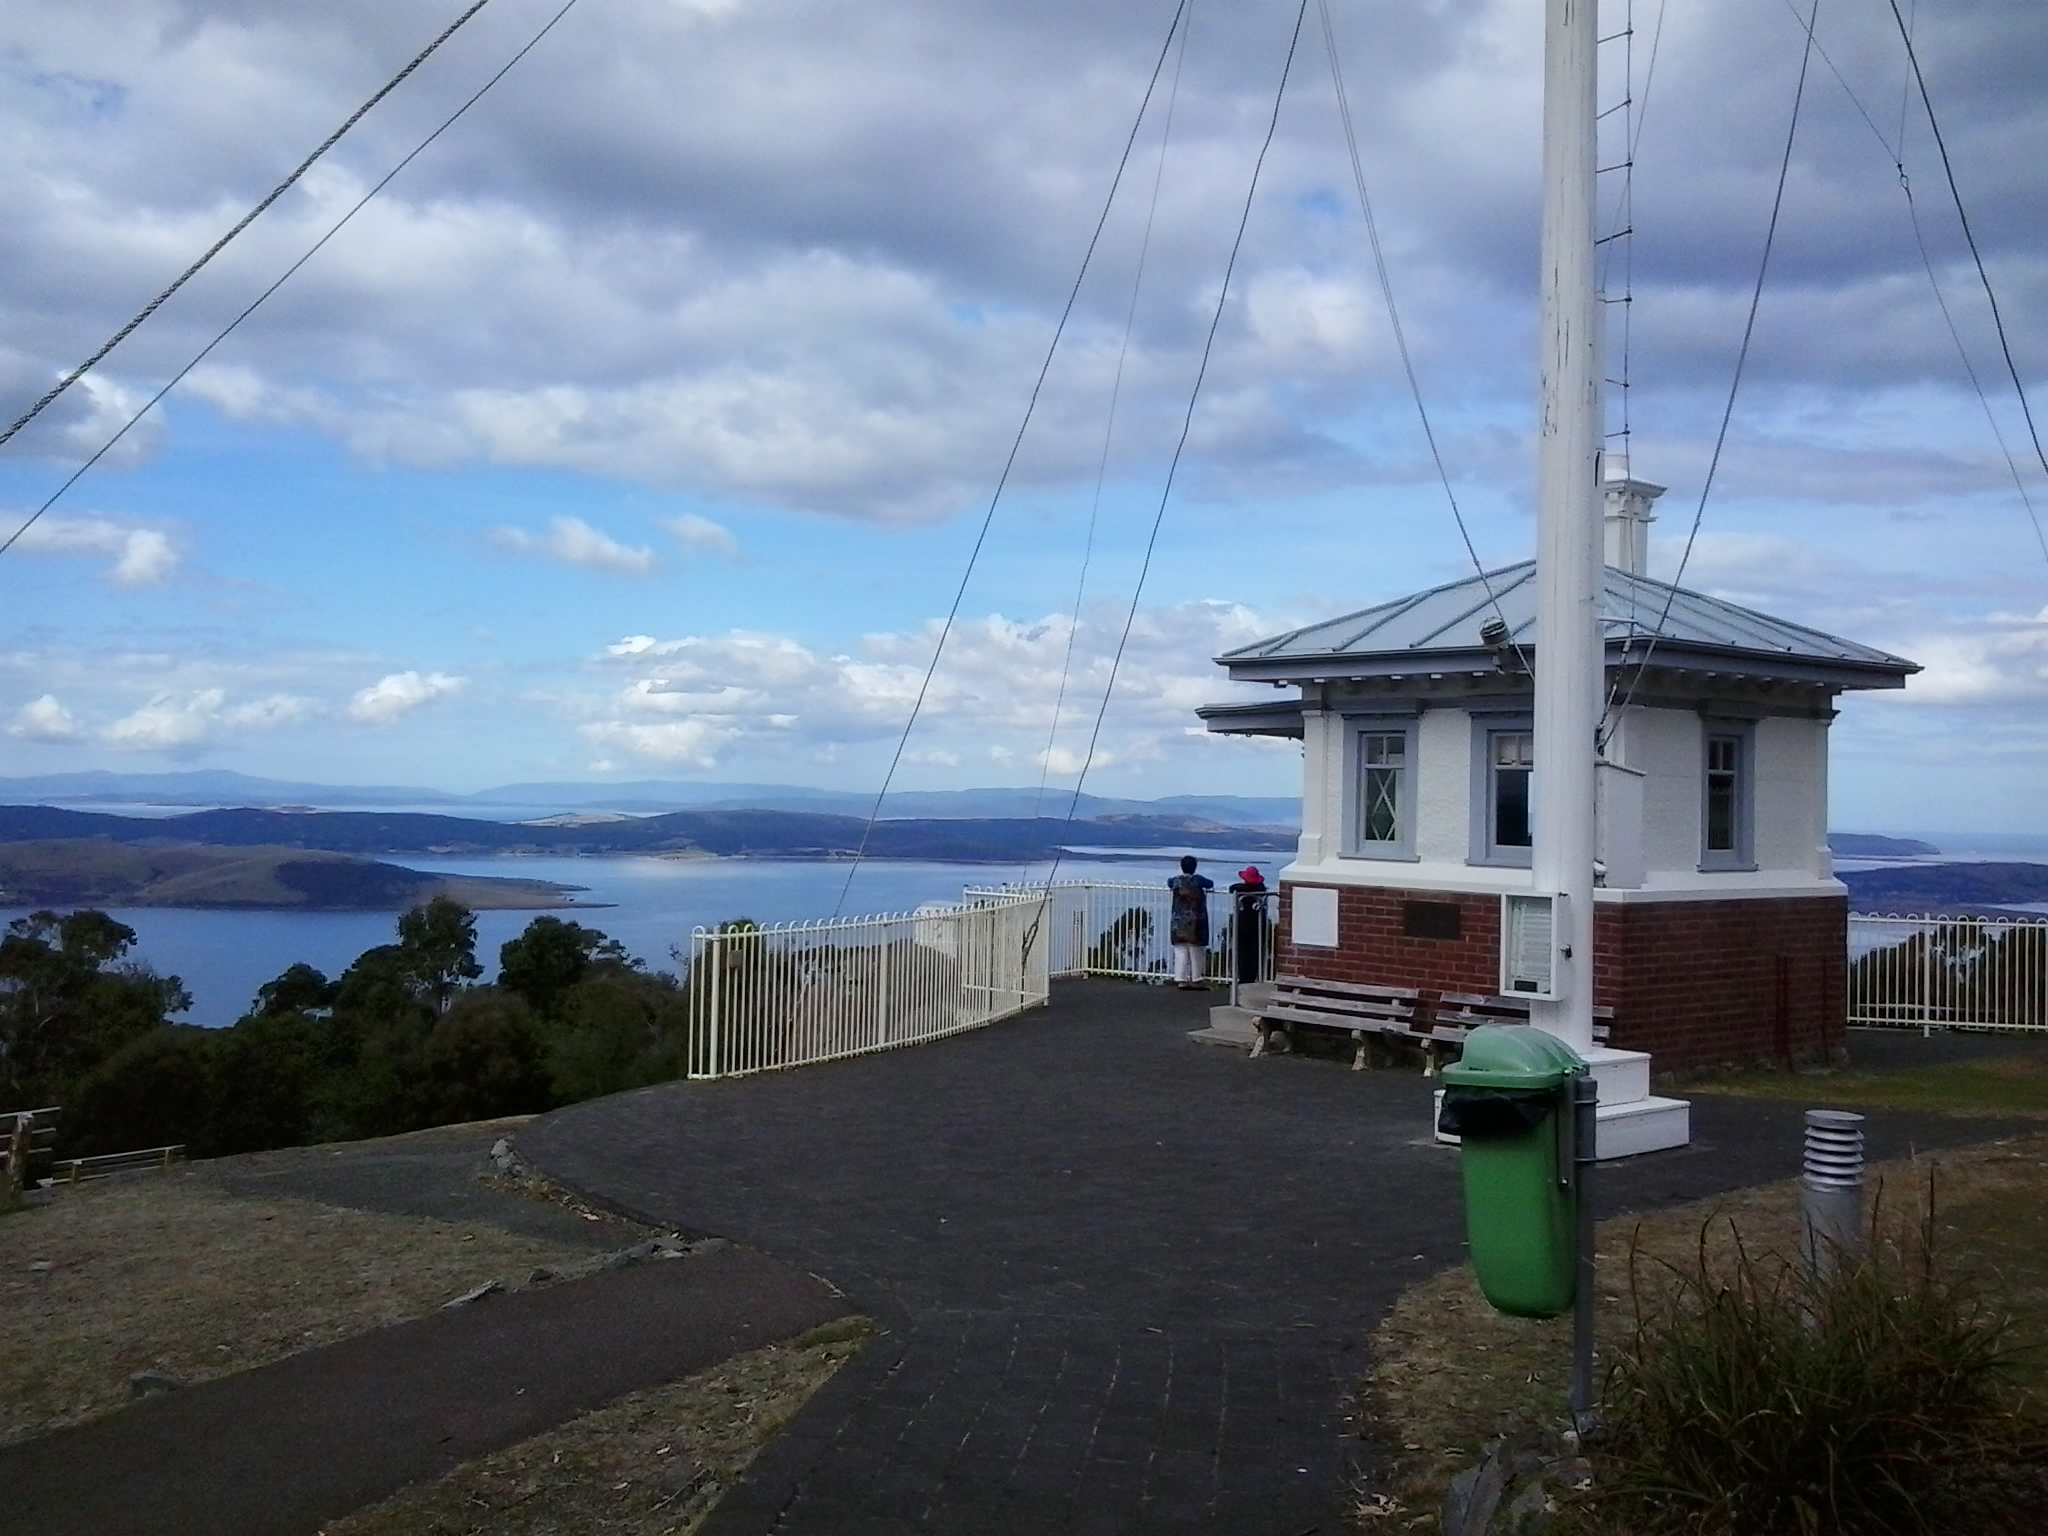
Overlooking the centre of the city of Hobart and with a view sweeping across to the eastern shore of the Derwent River, Mount Nelson is host to a significant historical site, the Mount Nelson Signal Station.

2015-03-09 14.49.17

Wikipedia provides the information that originally this rise in the landscape was named ‘Nelson’s Hill’ after botanist David Nelson, who sailed on the ship ‘Bounty’ which visited Van Diemens Land on its way to Tahiti (the ship that was involved in the infamous Mutiny on the Bounty). In geological form, Mount Nelson amounts to not much more than a low foothill, however its name gives an indication that something grand awaits you if you venture to the top.

And such a visit is easy in a vehicle, or if you want to take an uphill walk from Hobart’s suburb of Sandy Bay.  In addition, the Mount Nelson via Dynnyrne and Tolmans Hill Metro bus service can deliver you to your destination.  If you like walking, you might choose to catch a bus to the top and then follow any one of a number of clearly marked tracks downhill. Yesterday I made a visit thanks to blog follower Je’s transport, accompanied by another follower Be who is visiting from Cairns.

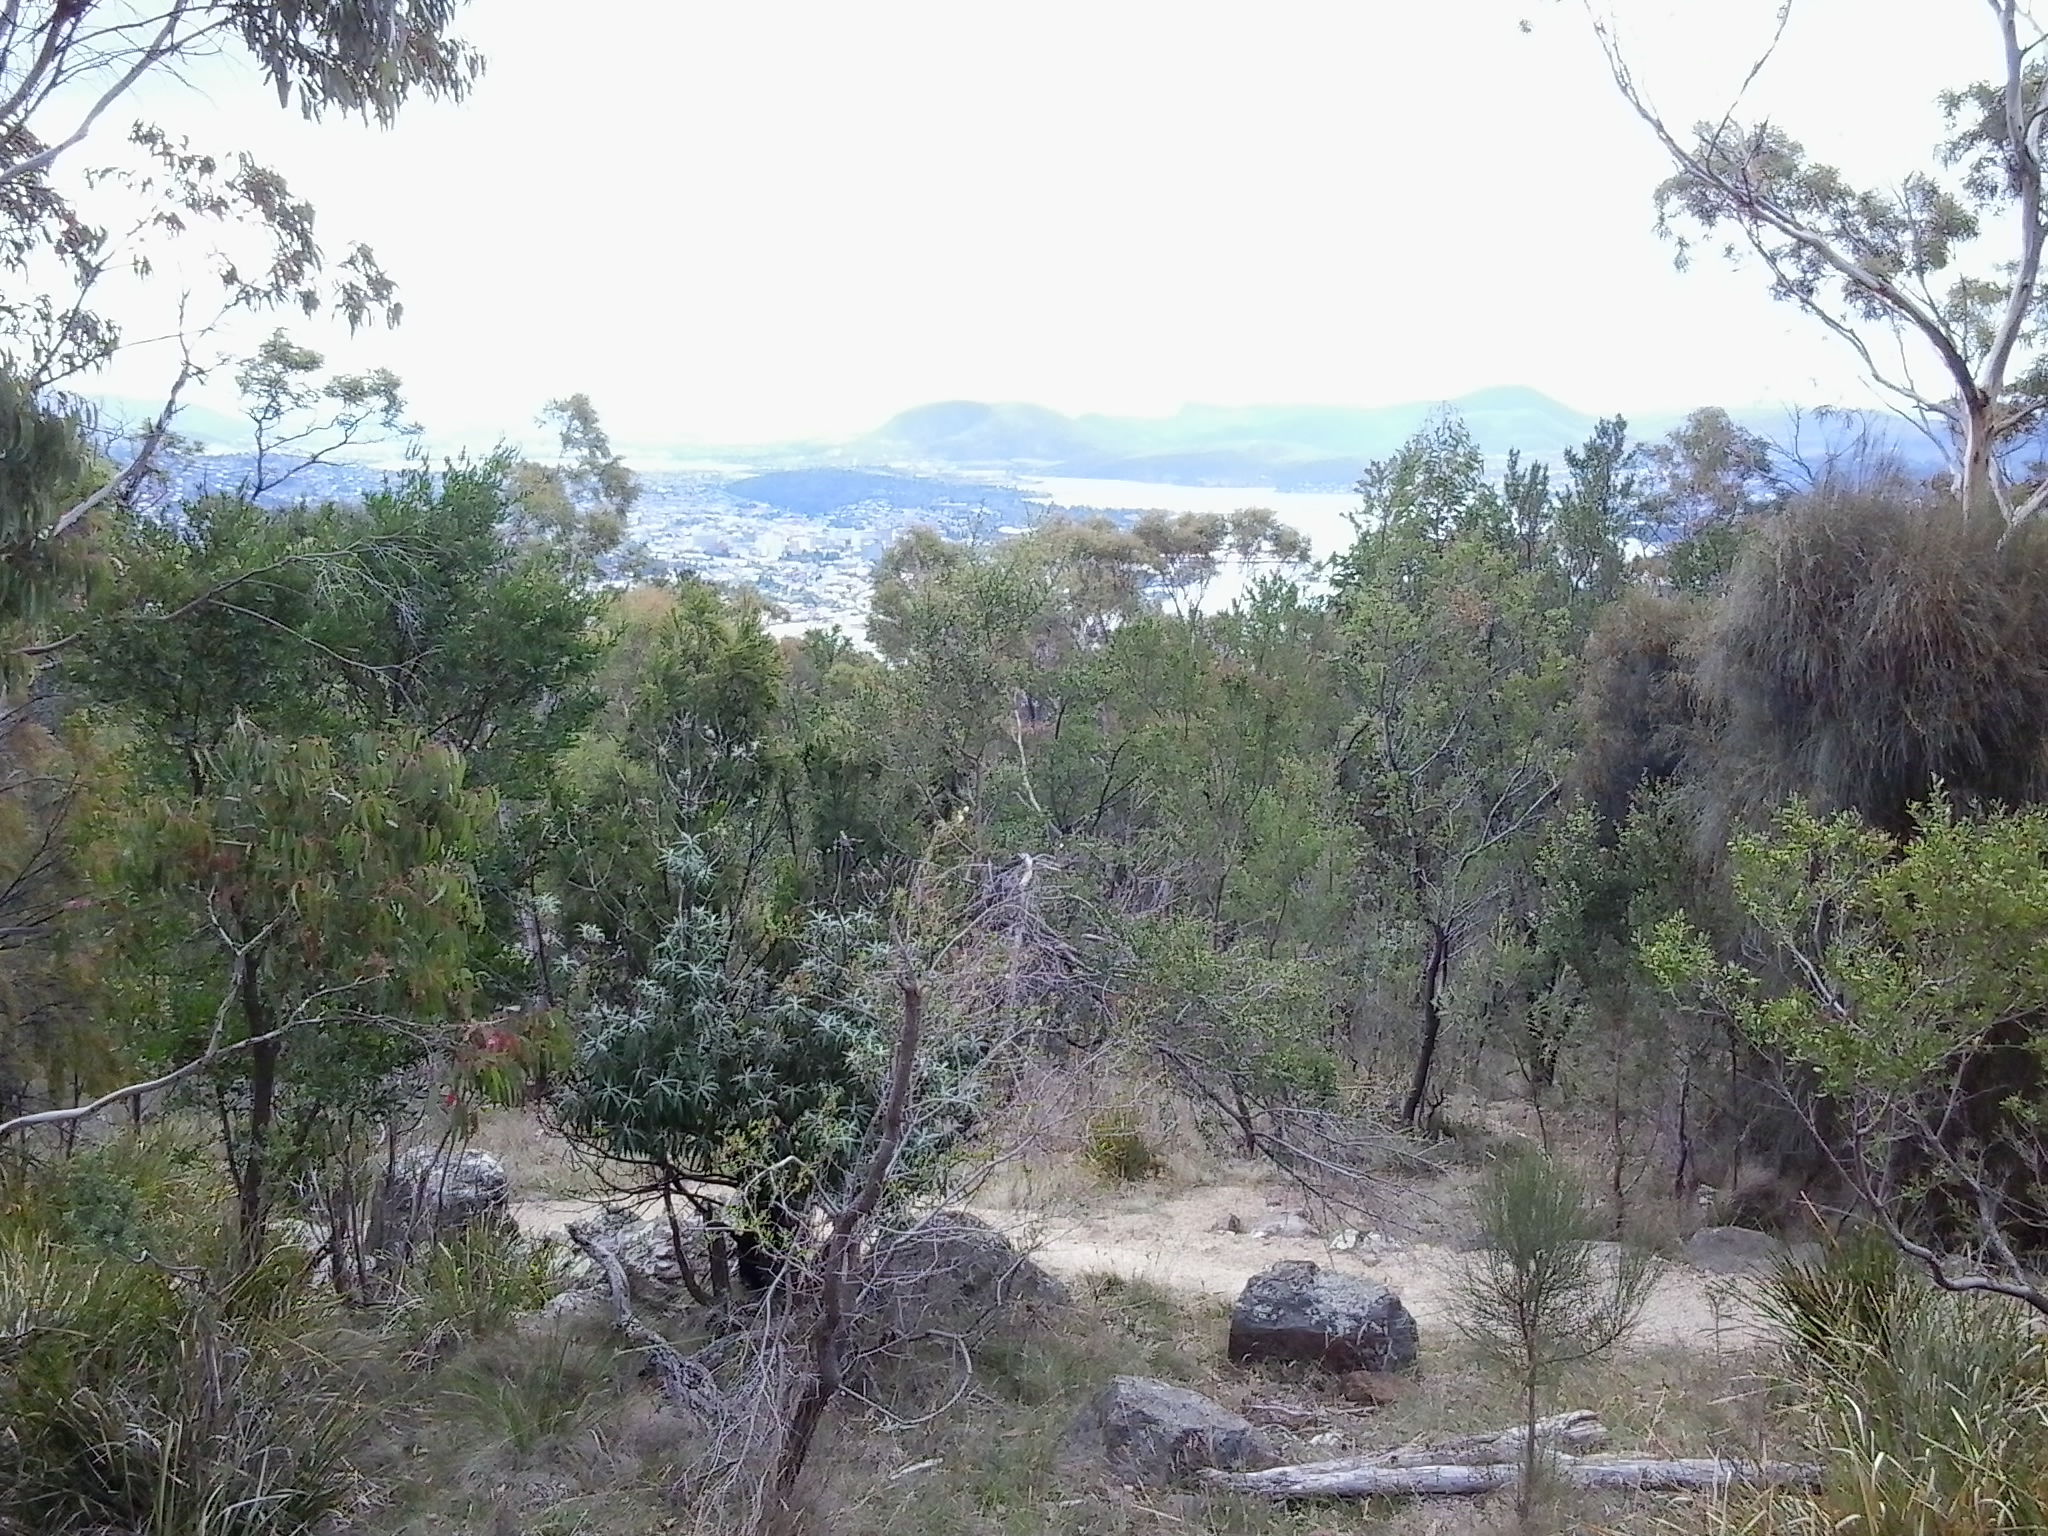
From different vantage points, the spectacle of the Derwent River spread out below, made us breathless with delight. When I am walking at ground level along the Derwent River, the grand panoramas extending into the distance are denied me.  But yesterday it was exciting to see the bays and hills further afield.

2015-03-09 14.50.30

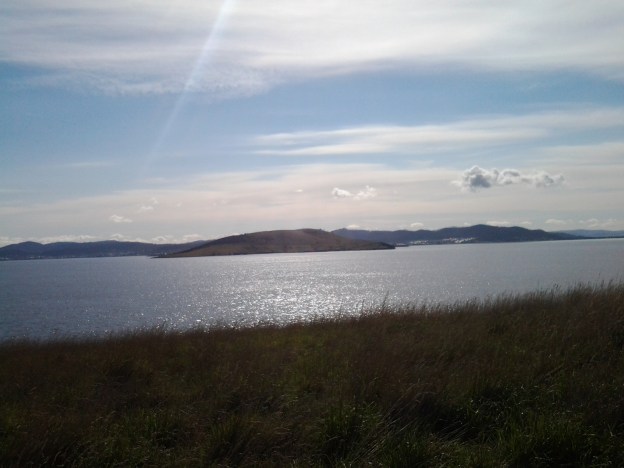
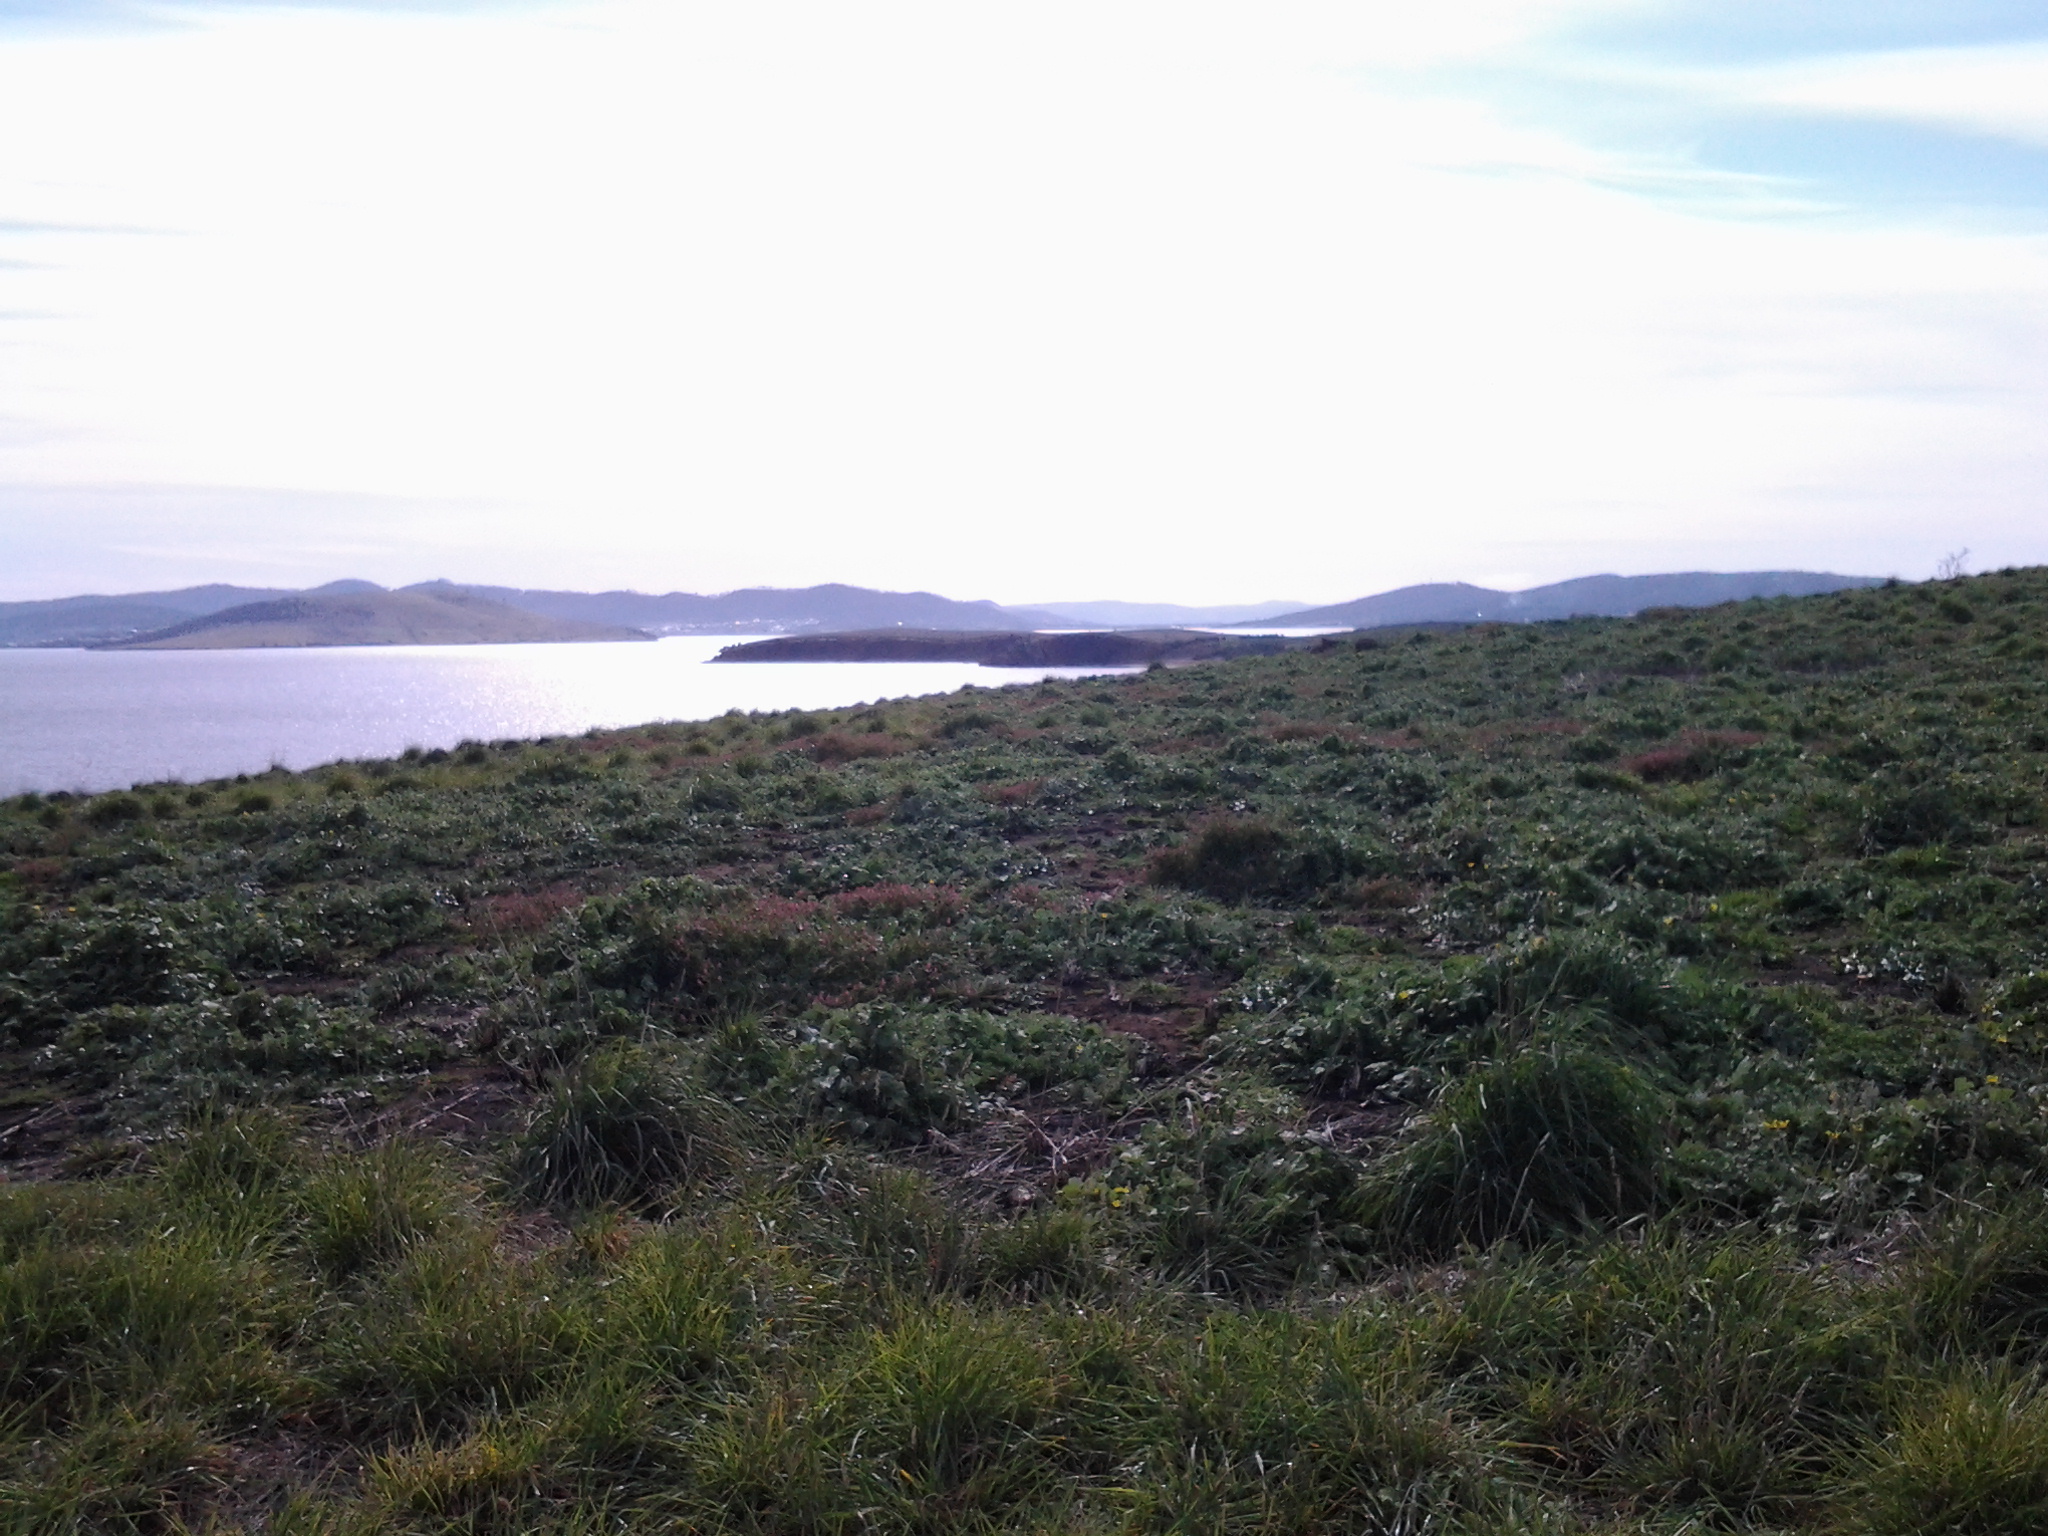
The photo above looks toward the mouth of the Derwent River on the eastern shore. South Arm peninsula can be seen extending along the water.  As  I stood on Mount Nelson I could clearly identify the Iron Pot, Fort Direction Hill, South Arm Beach, Opossum Bay and its beach, and  Gellibrand Point all of which I walked on during Stage 1 and 2 of my walk along the Derwent River.

2015-03-09 14.50.16

The photo above shows the eastern shore of the Derwent River with Gellibrand Point to the right on the northern tip of the South Arm peninsula. Then the great gaping space of Ralph’s Bay appeared straight ahead. To the left of the image, Trywork Point is in view; this was the starting point for Stage 3 of my walk (after I had walked there from the suburb of Tranmere).

2015-03-09 14.50.09

The photo above shows Ralphs Bay to the right, Trywork Point and then the suburb of Tranmere to the left – on the eastern shore of the Derwent River.

2015-03-09 14.49.55

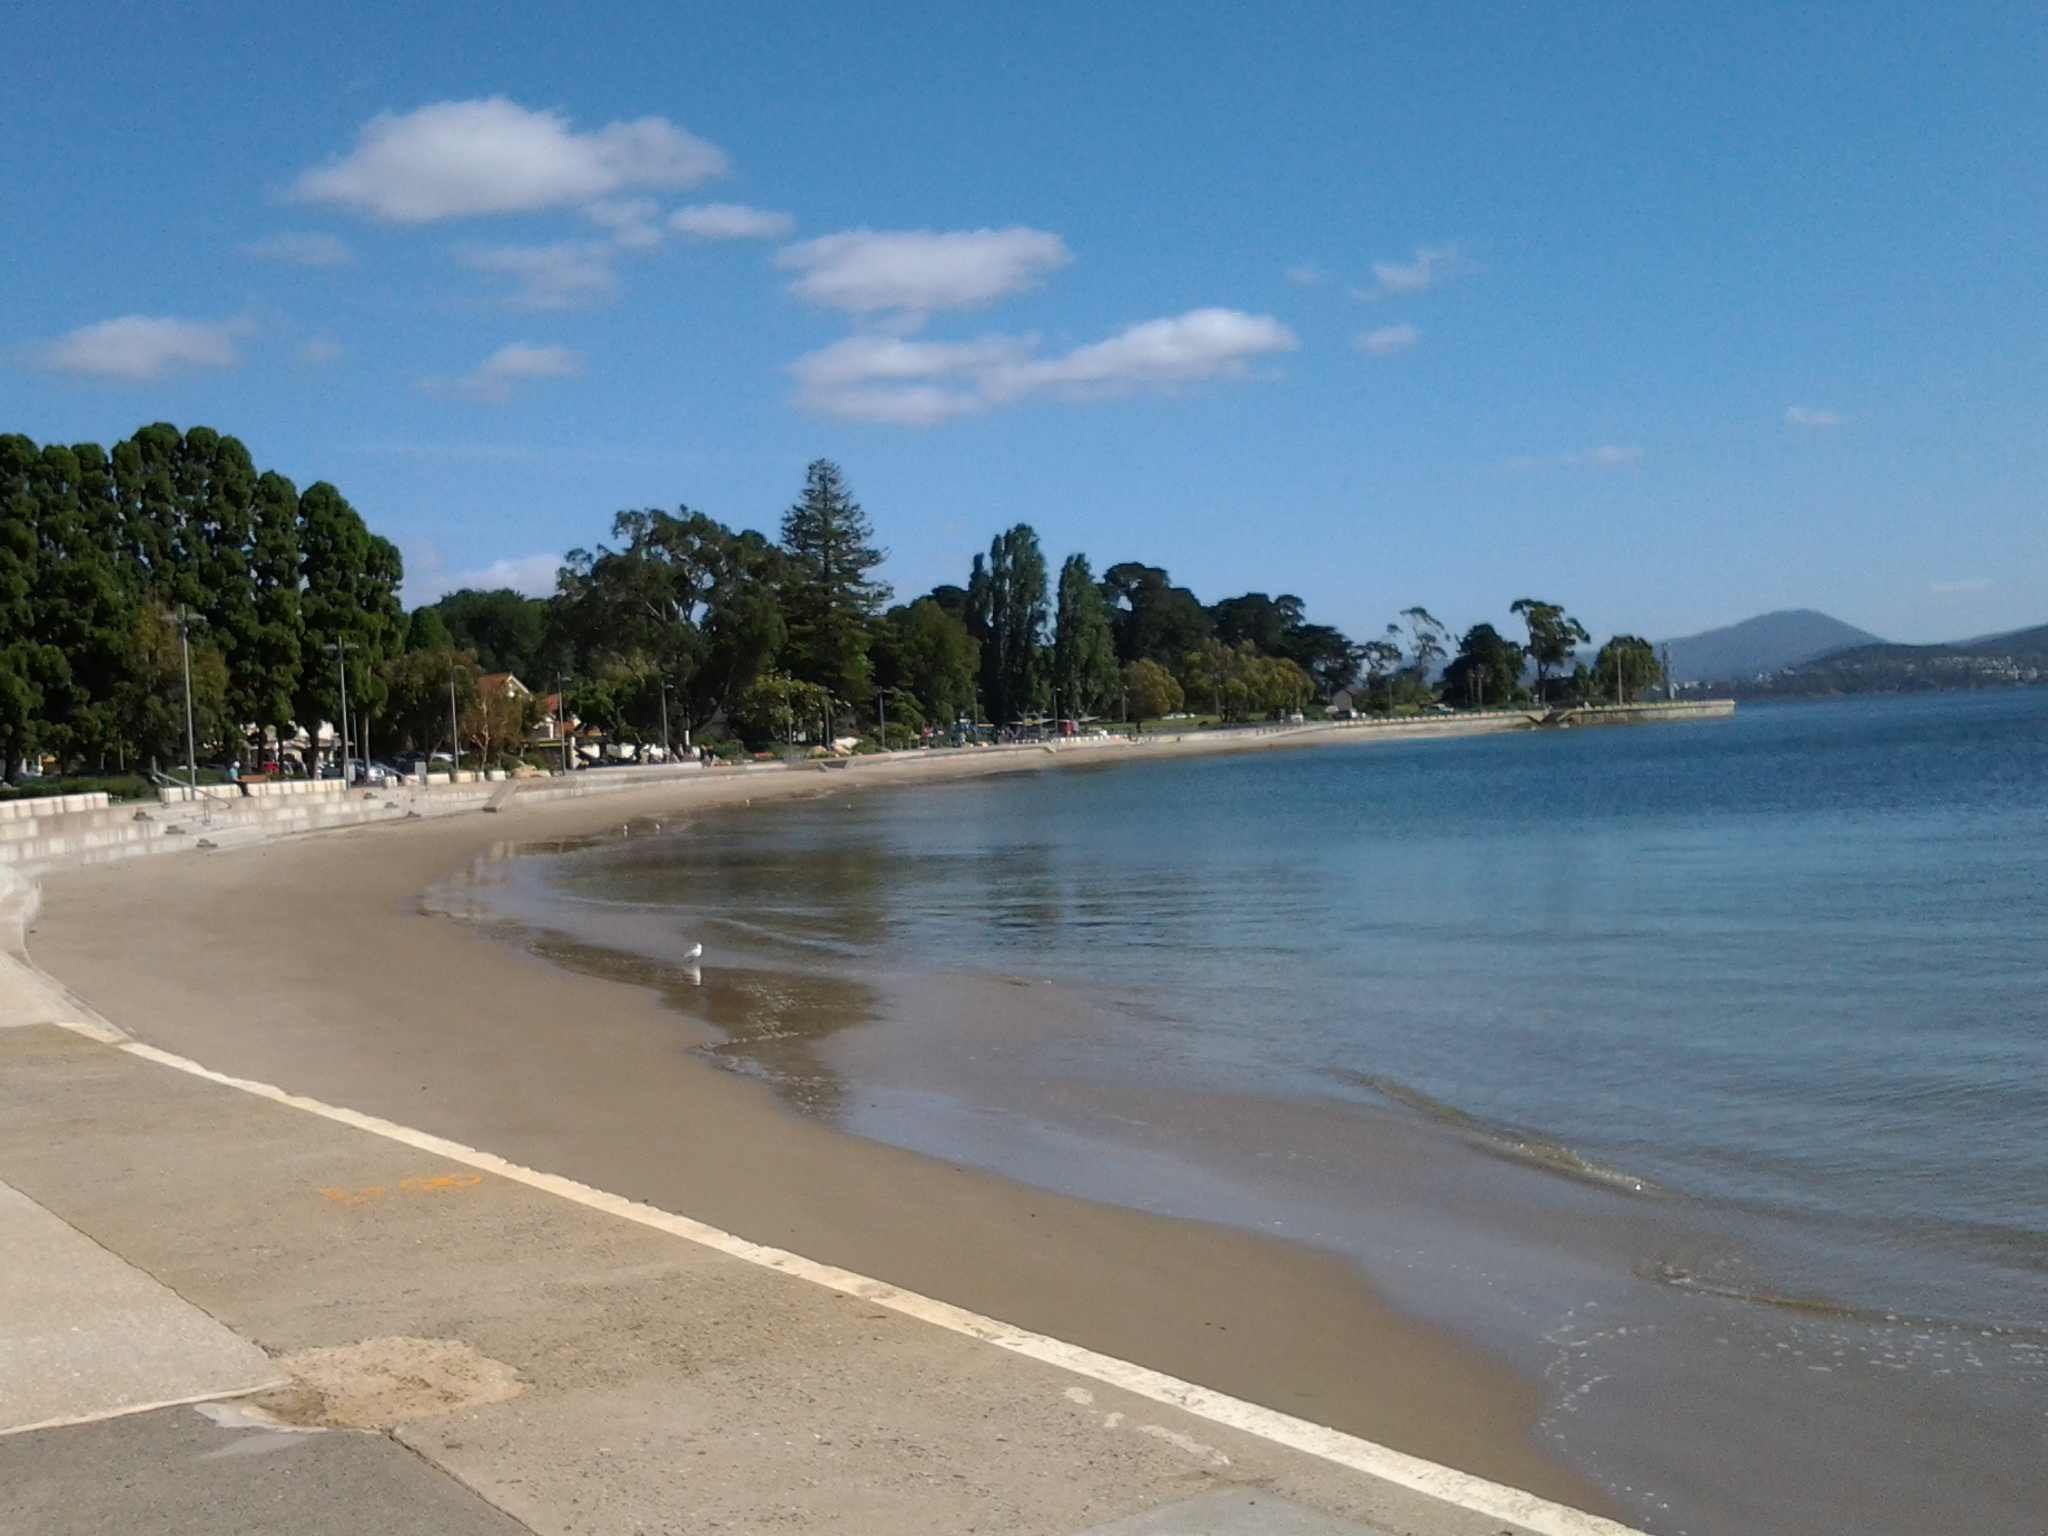
The photo above shows the eastern shore from Tranmere on the right, through the suburbs of Howrah to Bellerive on the left – the River edges which I walked during Stages 4 and 5.

Across the parkland at the Mount Nelson Signal Station, native Wrens flitted around feeling safe as they hunted for insect meals on the ground.

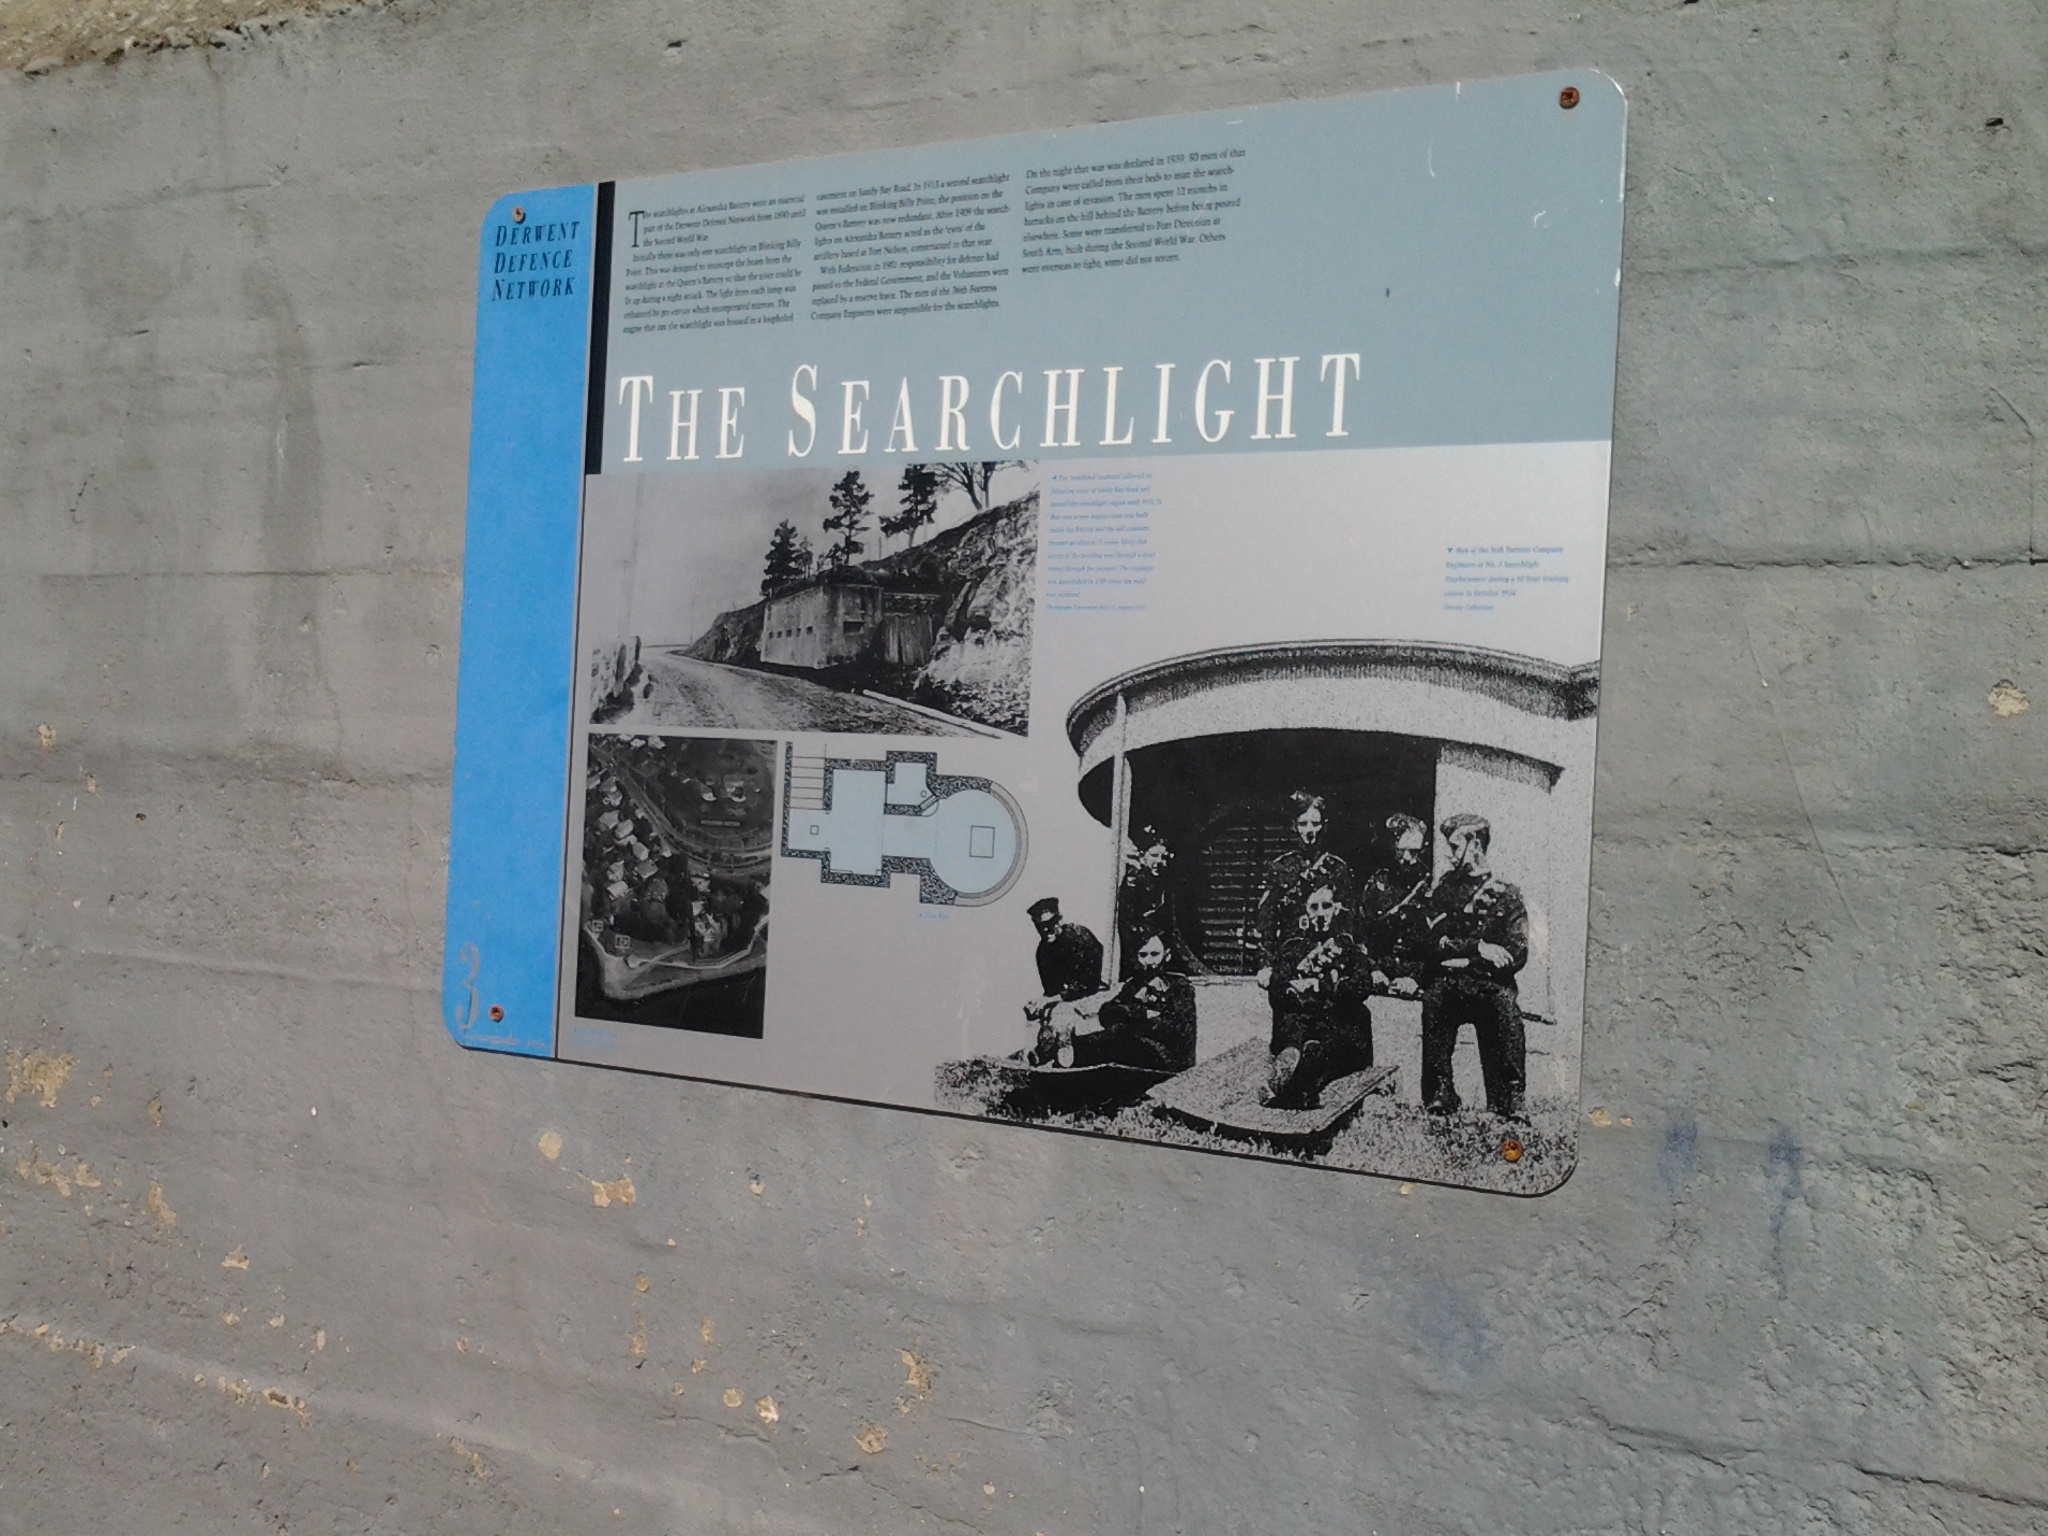
I enjoyed looking at information panels on the site and learning more about how the place operated.  In addition, one panel showed the location of walking tracks.

2015-03-09 14.53.12

So … what is the history? Not long after Hobart was settled in the early 1800s, locals needed speedy and efficient communication between the convict settlement at Port Arthur and Hobart.  In addition, Hobart residents wanted foreknowledge of sailing ships approaching from the ocean through Storm Bay and on their way to the Derwent River in case any provided a threat to trade or security. To gather this information, in 1811 the Mount Nelson Signal Station was established and designed to use semaphore.  The method of communication was flags waving across the hills.  Details about the semaphore flag signalling system can be read at http://www.anbg.gov.au/flags/semaphore.html.  The site http://en.wikipedia.org/wiki/Semaphore_line provides further information. At the Mount Nelson Signal Station, flags were run up a pole – this seems a very cumbersome process compared to a person waving flags. I hope that someday the signal station will offer a demonstration to the public so I can understand the process.  Give me a re-enactment please.

This semaphore communication service continued in use until a more reliable system was available (what happened at the Signal Station on windy days, in wet weather and when clouds obscured the view?).   It was not until 1880 that a telephone line connected Hobart and Mount Nelson.

Walking around the area is free of charge.  Some pathways are provided. The site has various public amenities including picnic tables, public toilets, carpark, barbecues and a restaurant.

2015-03-09 14.50.39

For further information about eating in the heritage building pictured above, go to http://www.signalstation.com.au.  I recommend that you phone in advance if you are depending on eating there. Yesterday, despite permanent signs indicating the Brasserie was open, another sign on the building indicated it was closed.

During my visit, clouds loomed powerfully over the city and river. The day light was so bright and strong that when I turned northwards and photographed the land and riverscapes, the sky glowed white.  So I clicked a few images pointed at the sky and this silhouetted the landscape.  Using my simple mobile phone as camera, I was never able to control the light of the images.

2015-03-09 14.55.09 2015-03-09 14.55.16 2015-03-09 14.51.33 2015-03-09 14.51.23

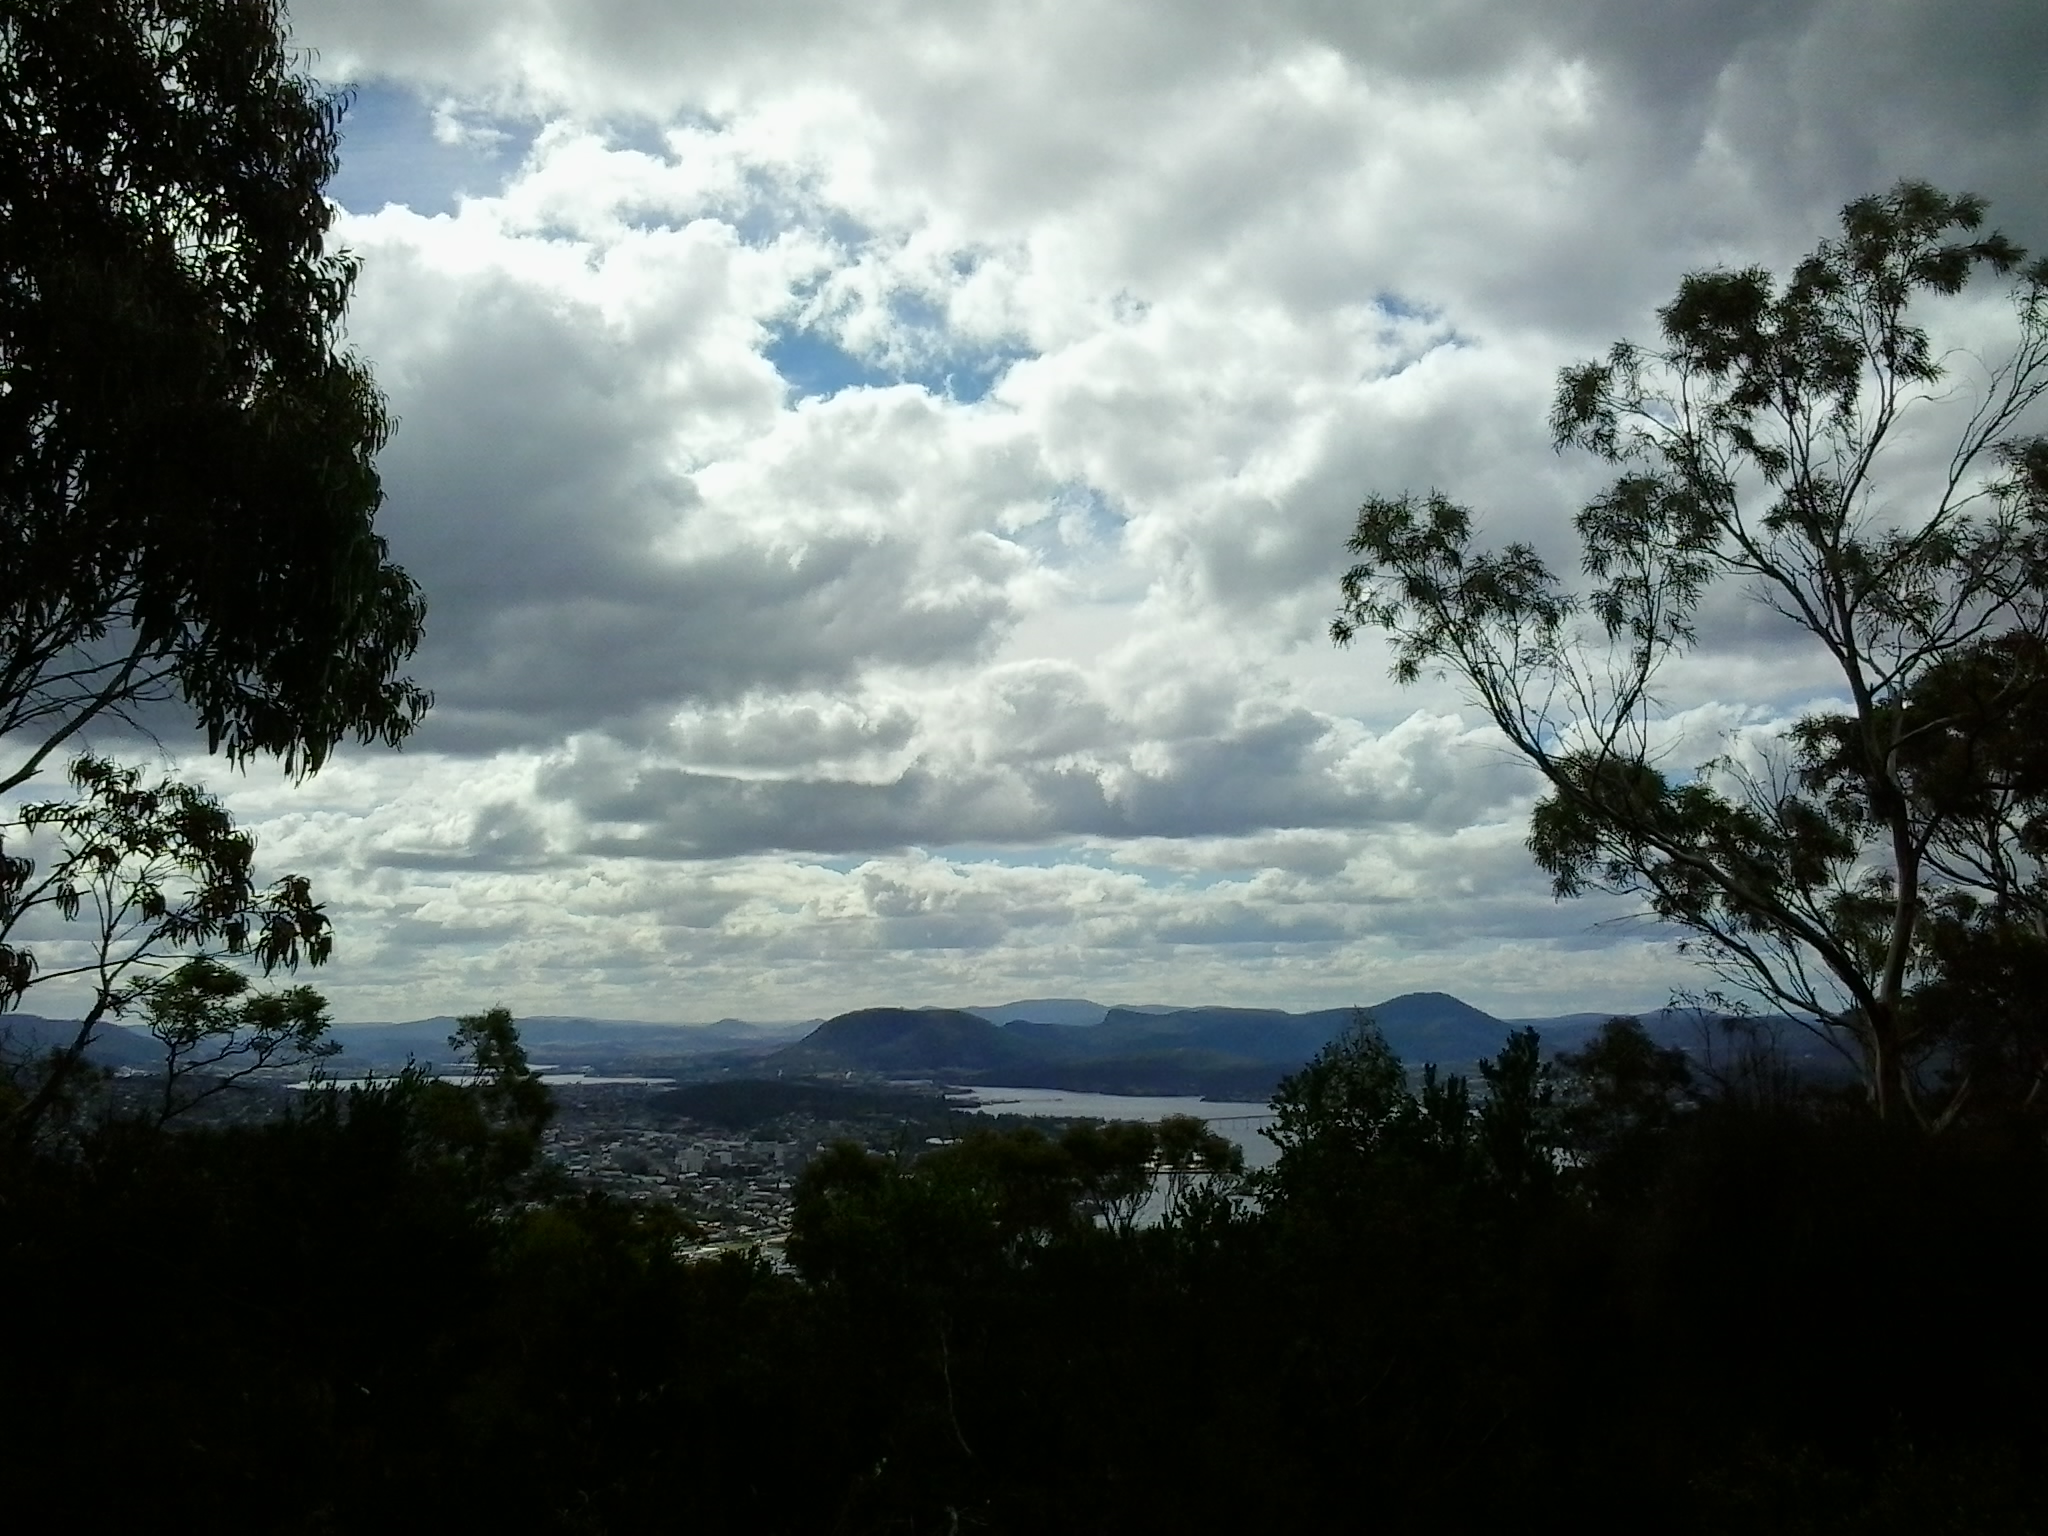
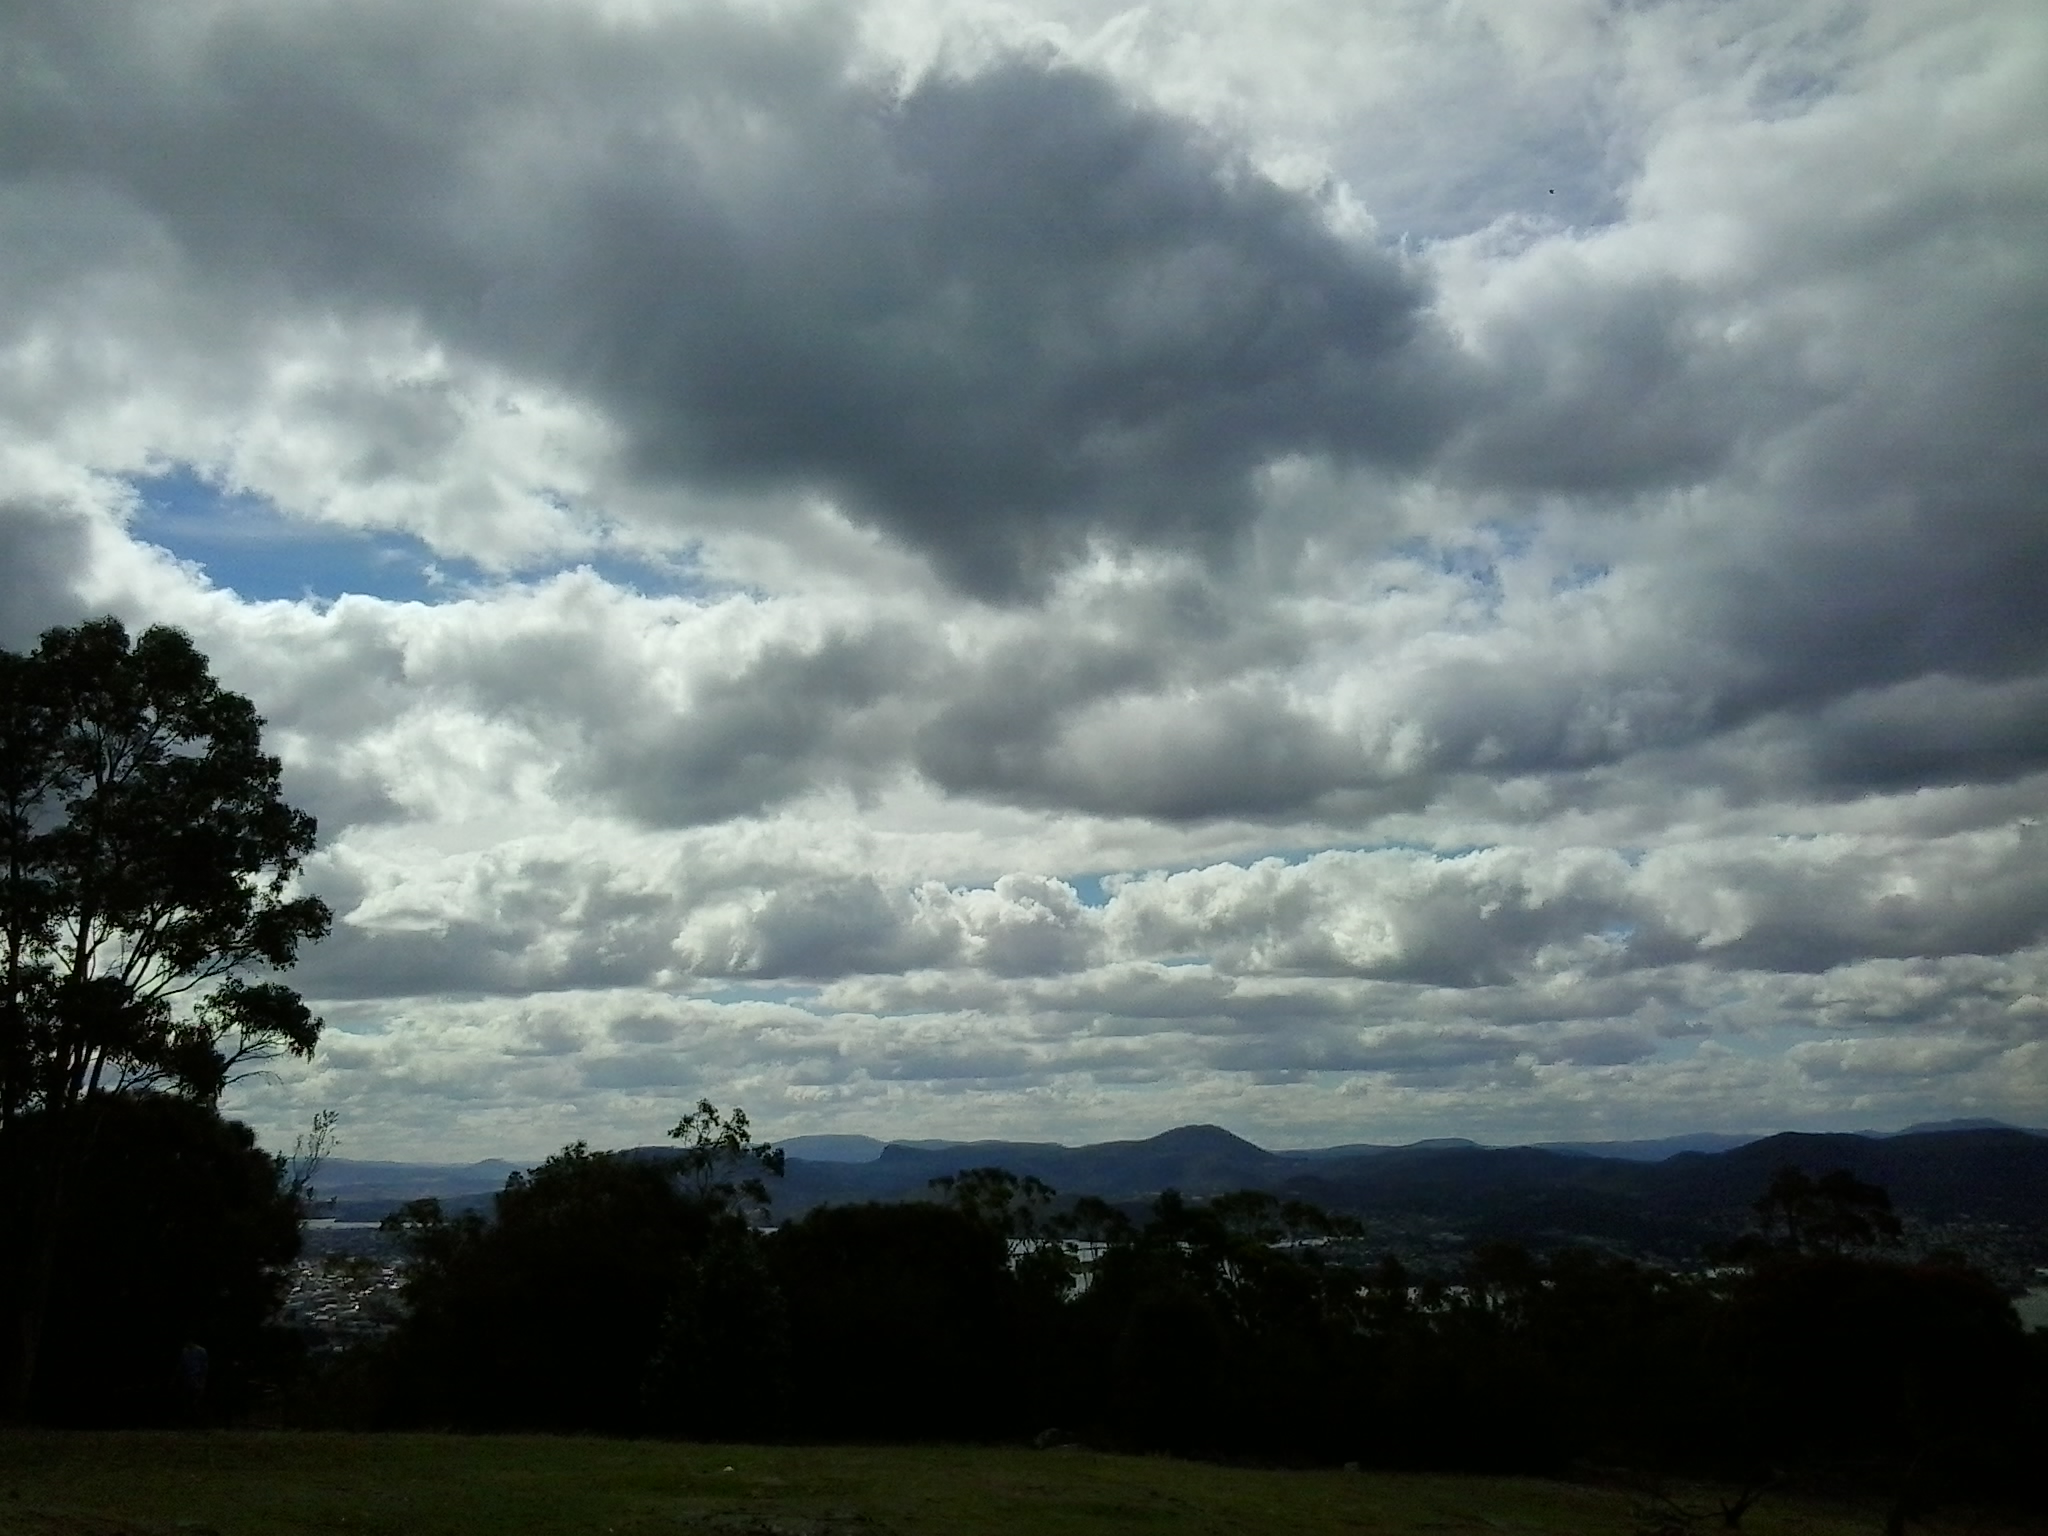
Although these looked like rain clouds, it did not rain.  These large puffs were just passing through.

Blinking Billy Point, Lower Sandy Bay next to the Derwent River

Continuing Stage 11 of my walk along the Derwent River, I walked the foreshore from Long Beach towards Blinking Billy Point. Looking northwards, the crescent of Long Beach stretched before me.

20150119_100336

I passed a new set of public toilets around 10am and ten minutes later I was walking around Blinking Billy Point.

20150119_101600

This was an area to which Charles Darwin (http://www.biography.com/people/charles-darwin-9266433) walked from Sullivans Cove (my starting point for this Stage of the walk) in February 1836. The area’s local government has remembered the occasion with an information plaque.

20150119_101336

Out in the water is a marker for water craft: the John Garrow Light (established in 1953).  I have known this was a marker used in the Sydney to Hobart Yacht race but I had never known where it was located.  Now I know: almost east of the Blinking Billy old lighthouse.  According to http://www.maritimetas.org/sites/all/files/maritime/nautical_news_winter_2002.pdf, John Garrow was a Sandy Bay pastry-cook, who lived in Bath St. Battery Point and died 1924. This begs the question – how did a nautical navigation tool come to be named after someone that seemingly had no connection with the Derwent?

I noticed that the Point has old defence structures embedded in the cliff. I learned that these were an adjunct to the huge hill behind with the remnants of the 19th century Alexandra Battery.

20150119_100941

20150119_101150  20150119_101159

Looking down the Derwent River through the glitter of the distance to the eastern shore, I could pick out Trywork Point (the southernmost tip of land before Ralphs Bay begins) and Gellibrand Point (the northern most point of the South Arm peninsula) both providing the ‘gateposts’ to Ralphs Bay. Previously, I explored these distant Points on Stage 2 and 3 of my walk.

20150119_100933

Then I looked back to Long Beach from Blinking Billy Point with Mount Wellington in the distance. How peaceful the world seemed.

20150119_100704

Despite the promises of a short beach in Geography Bay after the Blinking Billy Point, I knew better than to have expectations that continuing my walk on the foreshore was possible. The Sandy Bay Foreshore Track finishes at Blinking Billy Point.

20150119_101600

Some years ago a friend and I tried to walk the rocky shore southwards from Blinking Billy Point but, as the tide came in, there came a moment when we couldn’t move forward or backwards.  I remembered we scrambled up through someone’s property; the people were not at home and we let ourselves out onto the street hoping no alarm systems would be alerted. We were lucky that day.

Based on that memory, I knew it was not worth proceeding any further and retraced my steps around Blinking Billy Point until I could walk up to Sandy Bay Road.

Walking Howrah and Bellerive Beaches on Stage 4 of my walk along the Derwent River

On arrival on Howrah Beach, I chose not to deviate to the Shoreline Shopping Centre, having no desire for shopping and because the fresh air and walking experience was such a joy. The long Howrah Beach was almost deserted, however occasionally happy dogs and mostly happy owners were enjoying themselves; I am never sure who is taking who for a walk.  I was fascinated by the man who declared he was deaf and then told me his dog was deaf, yet they both seemed to communicate well and understand each other.

20140926_105712

The photo above shows the stretch ahead of me as I started along Howrah Beach. The photo below shows the Beach when I had walked half its length.

20140926_105703

The sky gathered clouds, and the onshore breeze cooled the air as I walked. Before long I reached Second Bluff at the end of the Howrah Beach, and walked up and along the gravel pathway around this headland. At both the southern and northern ends of Second Bluff it is easily possible to walk off towards roads and, in the distance, to reach the main connecting route, Clarence Street, along which buses run regularly.

While walking around this Bluff, I passed some large Australian native Leptospermum trees in full flower; their snow-white petals presented a spectacular display.  Off and on I noticed bright bursts of fleshy native pigface acting as ground cover, with its purple-pink flowers made brilliant by the sunlight. I was afforded spectacular views back to Howrah, Tranmere, Droughty Hill, across the opening of Ralph’s Bay, and of Gellibrand Point and Fort Hill on the South Arm peninsula.

20140926_112427

20140926_112443

Once I reached the Bellerive Beach stairs, I descended and took my walk towards the northern end of the Beach over a kilometre away.

20140926_113238

From time to time tall white poles with red tops are positioned along the beach to indicate walkways to the Clarence Foreshore Trail behind the dunes and then the roads and suburban houses of Bellerive.

20140926_115126

Bellerive Beach is much frequented by fitness fanatics, walkers, joggers, kids, families, individuals, and dogs on leads with owners.  The clean sand, the tide moving the Derwent up and down the beach, and the startling prominence of Mount Wellington are always welcome.

20140926_115121

Near the far end of the Bellerive Beach, a massive structure looms above a row of tall pine trees. This is Blundstone Arena, once known as the Bellerive Cricket Ground. This sportsground, as a national venue for international and local cricket games in the summer, also hosts major AFL (Australian Rules Football) and state level games during the winter months. Between Blundstone Arena and the beach are public toilets along the edge of the Clarence Foreshore Trail.

20140926_121450

Further on and next to the Trail, an outdoor adult gym inspires beach visitors and picnickers to push and pull and otherwise move their bodies.  From here you can see a blue and white painted building standing prominently.

20140926_115457

This is Bellerive Beach’s Fish Bar where fresh fish and other seafood is battered or crumbed and cooked while patrons wait. Dining in or taking away are the two options; the weather and wind generally controls whether I take a fresh cooked meal and sit on the edge of the beach with friends. I live in Bellerive and so I know very well this Beach and all the delights which it offers.

On this walk as usual, I brought my own packed lunch so I passed the Fish Bar and sat towards the end of the beach, and munched and contemplated the leisurely activity of others. A simple pleasure amidst the flighty flashing of hungry squawking silver gulls, all expecting to be fed.

20140926_120252

Stage 3 On the way to Trywork Point along the Derwent River 20 September 2014 Posting 2 of 6

It was 9.13 am when I got off the bus at Tranmere (that is, a 25 minute bus ride from the Hobart city centre) and I was ready to walk but unsure which route to take.  My first idea was to walk up some side streets hoping their ends would be in open paddocks which I could walk across. I can now tell you not to walk up Norla St or Spinnaker Crescent to the locked gates and fences,

Top of Norla St- gates blocking progress

unless you want to appreciate the fabulous views of the River and beyond. At 9.45 am I was back down onto Oceana Drive near its southern end where the Crescent makes its connection.

The sealed bitumen road of Oceana Drive quickly changes into a gravel road. Then across my path a padlocked gate and a barbed wire fence that descends towards the River, effectively blocked my progress.  The tiny yellow sign glowed in the sunlight: Keep out private property.

Ahead of me on the other side of the gate, a car track wound into the distance and then disappeared into a gully. On the crest of the distant hill sat a forest of casuarina trees. Before these trees, and across the hill, golden grasses rippled when the wind blew onshore.  The sky was blue.

Sometimes there is a correct way and an incorrect way to go about doing things.

My intention has always been to provide directions for people who would like to follow in my footsteps and so if I was to describe a way that cannot be repeated, then I would mislead you. It is sufficient to say that I went the wrong way but returned the right way.  Yes yes yes. You guessed it.  I jumped that gate onto private property and continued on with plovers wheeling overhead all the while trying to protect their little bird that ran in terror into the tussocky grass. 20140920_095305

In a later posting I will describe how to walk to Trywork Point without walking on private land.

It is clear that someone is currently subdividing this land and I guess that new blocks of land will be offered for sale at some time in the future. Once this happens, then the land will be opened up and become accessible. Well-worn single file cattle tracks, evidenced by hoof marks and weathered cow pats, ranged through this land. Everything was dry and disintegrating so that I didn’t believe a herd had passed along these tracks recently.

I reached a new fence with a prominent sign on the other side: This is NOT public land.  Uphill the fence stopped in the middle of nowhere so I continued across the hill towards the forest of Casuarina trees.  I was careful that the short tussocky grass and the occasional hidden rock didn’t roll and sprain my ankles.

20140920_100104

Once into the trees, and dodging low branches, I followed meandering tracks all the while making sure the Derwent River remained clearly on my right. Throughout today’s walk occasionally and unexpectedly rusty pieces of fencing wire wanted to trip me up and harm me, so constant vigilance was required to avoid these dangers.

Before long and once out of the trees, a wonderful vision of The Spit and Gellibrand Point on the South Arm peninsula greeted me. Between me and Trywork Point was an ocean of moving grasses. Golden. Shimmering. Glorious. Winds sweeping. Isolation.  Silver Gulls floated overhead.

20140920_101617

In the photo above, the two small green trees at the bottom of the hill mark Trywork Point. Gellibrand Point is on the left across the water. The dark blue represents the huge expanse of the Derwent River’s grand harbour.

The cattle hadn’t made tracks down to Trywork Point so I thumped my own path down through the tussocks and occasional scrawny remnants of rose bushes. Eventually I arrived and unfortunately disturbed a pair of Dominican Gulls who seemed to ‘own’ the rocky point. I couldn’t see evidence that people had been here in a long while.

20140920_102703

The photo above is the rocky edge of Trywork Point, with Gellibrand Point on the South Arm peninsula in the distance.

When I looked eastward towards Droughty Point, a headland at some distance inside Ralph’s Bay, I was surprised to see before the point was reached, a small secluded sandy beach.

20140920_102734

Between the beach and Droughty Point, a healthy herd of red brown cattle rested and munched comfortably on an area of luscious looking green grass.  I guess they are the beef steaks of the future.

Stage 3 Getting to Tranmere for another Derwent River walk 20 September 2014 Posting 1 of 6

This Saturday morning in Hobart was gloriously sunny so it was time to take a walk along the Derwent River. The Camelot Park number 615 Metro Bus departed from the city bus mall at 8.48am and travelled to the eastern shore of the Derwent River. I jumped on the bus a little after 9am having already enjoyed the short walk to the bus stop past ornamental cherry trees plump with green buds and a sprinkling of newly opened palest of pink flowers, past the mass of flowering jasmine strangling a fence between neighbours, and past the rich red pink jewels of a flowering nectarine tree that promises tasty juicy fruit in the new year.

The bus continued along Cambridge Road before turning left along Clarence Street, which runs parallel to the Derwent River.  I wondered whether the name was in remembrance of Lieutenant John Hayes’ ship the Duke of Clarence, a British Duke of Clarence from some era, or whether there had lived an interesting Mrs Clarence once upon a time whose memory is now enshrined in this long street.

Half way along the street, a sign noted the change of suburb from Bellerive to Howrah. Soon the bus was pulling into the mini bus mall in the Shoreline precinct of a hotel and a shopping plaza.  Moments later the bus was travelling down the road towards the River and, after sweeping around a bend, it continued through the suburb of Howrah then the suburb of Tranmere, always parallel to the River. I had a clear view of Mount Wellington and the city centre of Hobart on the western shore. Between sat an almost rippleless dark blue Derwent Harbour. It wasn’t long before I could see, in the distance, the treeless hills that I expected to be tramping across.

Around ten minutes after leaving the Shoreline, the bus circled into bus stop 33 at the corner of Tranmere Rd and Oceana Drive. This was the final stop, and as I got out the driver turned off the engine and stepped out to stretch his legs while waiting for his return departure time to arrive. The air was clean and the day was colourful. I stood on Oceana Drive edged by large suburban houses and felt the strength of a cool breeze.

A number of black and white magpies were broadcasting their fantastic singing voices. Their melodious sounds were crossed with a cacophony of the de daaa tt de daaa tt of the wattlebirds.

20140920_091642

I was standing at the bus stop when I took this photo looking along Oceana Drive in the direction that I needed to walk. But despite my maps and internet research I stood still looking and puzzling, and not clear where to walk or whether I would be able to access my starting destination: Trywork Point.

Stage 2 of my walk along the Derwent River finished at Gellibrand Point and the next point directly across the inlet to Ralph’s Bay was Trywork Point on an exposed headland. So today’s walk needed to start at Trywork Point, south of this bus stop, but I had to get there on foot somehow before retracing my steps to continue walking northwards along the Derwent River.

20140920_091918

I started walking along Oceana Drive then looked back from where I came and clicked this photograph. The bus is still ‘resting’ where I left it.

How did Hobart’s Derwent River get its name?

Dan Sprod’s information for the Centre for Tasmanian Historical Studies was a great help in understanding that our Derwent’s (http://www.utas.edu.au/library/companion_to_tasmanian_history/R/River%20Derwent.htm) European discovery was made during the second (1793) visit to what is now the island of Tasmania, by French explorer Bruny d’Entrecasteaux. The given French name ‘Rivière du Nord’ never took hold. When Englishman Lieutenant John Hayes arrived in April 1793, he was unaware of d’Entrecasteaux’s visit two months earlier, and named the river after the Derwent River in England.

Great Britain’s Derwent River flows through Cumbria, a sparsely populated non-metropolitan county in the north west of England.

Cumbria contains the famously beautiful Lakes District, and presents as a combination of mountains, rugged seashore, parkland and rural landscape. In the early eighteenth century, the landscape and climate similarities between Cumbria and our island’s river backed by the stunning Mount Wellington make it easy to understand how our river came to be named.  In England, the name Derwent is derived from a Celtic word for “oak trees”.  Australia and Tasmania do not have native trees with the same leaf and character as English Oaks. However the heavy thick forests with large stands of trees either side of Tasmania’s Derwent River, would have made a strong impression on Lieutenant Hayes.

The Cumbrian Derwent flows westwards towards the Irish Sea; the city of Workington sits at the mouth. Google Earth includes photos of a mountain, powdered with snow, showing similarities with our Mount Wellington at cooler times.  I imagine Lieutenant Hayes would have been away from England for many months, if not years, and so his ability to make direct comparisons between his English and our river would be based on hazy memories.  Notwithstanding this, when I look at a current photo of the Derwent in Cumbria, the landscape has a character similar to our local environment. Of course, the landscape and its features at both locations will not be the same as when seen in the late 1700s. However and despite the passing of centuries, I can see how and why Lieutenant Hayes chose to name our river, the Derwent.

But what about the man; what was Lieutenant Hayes connection with Cumbria and the Derwent River?

The Australian Dictionary of Biography (MUP Volume 1 1996) notes that Sir John Hayes (1768-1831), naval officer and explorer, was baptized on 11 February 1768, the son of Fletcher Hayes of Tallentire on the River Derwent, England. On 7 December 1781, when 13, he joined the Bombay Marine as a midshipman on the Bombay. By December 1788 he was promoted to second lieutenant and his rise through the ranks continued over the years. Hayes is best remembered for a private voyage undertaken between February 1792 and December 1794. Glowing accounts of New Guinea’s economic potential fired Hayes to lead an expedition financed by some Calcutta merchants. On 6 February 1793 the Duke of Clarence (250 tons) and the Duchess of Bengal (100 tons) left Calcutta, India. Because of adverse winds Hayes could not sail direct to New Guinea, so at the young age of 27 years, he decided to voyage round New Holland (this was the original European name for Australia). He reached Van Diemen’s Land on 24 April and left on 9 June. During that time, he discovered and named the Derwent River, and other features of the terrain. Risdon Cove and Cornelian Basin still bear the names he gave them. According to the publication “British Heritage of Tasmania’, (http://members.iinet.net.au/~rwatson1/britishheritage/BRITISH%20HERITAGE%20OF%20TASMANIA.pdf

Hayes named Ralphs’ Bay (a beautiful bay which I have mentioned during both my first and second stage of walking along the eastern shore of Tasmania’s Derwent River) at Lauderdale, after William Ralph who was in charge of the Duchess of Bengal.

While I would like to think that the City of Clarence (the eastern shore city of the Greater Hobart Area and the one in which I live) must have been named specifically after the ship which Hayes’ commanded, this apparently isn’t true.  It seems that the City of Clarence was named after King William IV of the United Kingdom who as he ascended the throne was titled His Royal Highness, The Duke of Clarence and St Andrews. However, let’s look at this a little more closely. In 1843, Prince William (the future King William IV crowned in 1830) began a career in the Royal Navy by becoming a midshipman at 13 years. In 1789 he was made Duke of Clarence, and then retired from the Navy in 1790.  The elements are: the future king is a naval man who held the title of Duke of Clarence before Lieutenant John Hayes (who started his naval career as a midshipman) set out from India towards Australia. Travelling to Tasmania, Hayes just happens to be in command of a ship named the Duke of Clarence in 1793. How did his ship get the name?  Considering the timing, surely Hayes ship was named in honour of the new Duke of Clarence (the Sailor King or Silly Willy as the future king was known). I would prefer to believe that the name of today’s City of Clarence lying along the eastern edges of the Derwent River, is a reference to the ship of the man who named our River, and only indirectly refers back to the early title of King William IV.

Preparing for the next stage of my walk along the Derwent River

The image featured directly above is of the watery inlet from the Derwent River on the left into Ralph’s Bay on the right. The low hill in the distance is north of and opposite from Gellibrand Point (which is at the northern end of South Arm peninsula). The low hill is Droughty Hill: Trywork Point will be to the lower left of the hill.

Previously, I walked from the mouth of the Derwent River and covered the length of the South Arm peninsula which amounts to approximately 11 km of the River. Stage 1 took me from Cape Direction to the Opossum Bay shop. Stage 2 took me from the Opossum Bay shop to Gellibrand Point. Only 238 Kms to go!

Continuing on from the last walk will require me to leap-frog over approximately 2kms of water for the next starting point Trywork Point which is south of the Rokeby Hills. The reason for my ‘jumping over’ is that I am guessing that the Derwent River was measured as a ‘straight’ length and did not count the many extra kilometres going in and out of every bay and crevice. The water between Gellibrand Point on the South Arm peninsula and Trywork Point is the entrance to the large Ralph’s Bay which feeds off the Derwent River.

So my initial destination for Stage 3 is Trywork Point – that will mark the start of the walk. To reach this starting point I will need to walk south from a bus stop and then later be prepared to retrace my steps or find a more suitable alternative route before continuing northwards through as many Hobart’s eastern shore suburbs as my feet will carry me.  The suburban area has frequent bus services (by comparison with the Opossum Bay bus service) so that timing the duration of Stage 3 is dependent on my health and inclination rather than on bus timetables.

Unfortunately, TasMAP Taroona 5224 is not a great deal of help for reaching Trywork Point. It clearly shows the acres of land between the bus stop and Trywork Point but offers no roads or tracks. I am clear that I will walk from the last Camelot Park bus stop (Metro Bus number 615) south to the Point – somehow. The Hobart and Surrounds Street Directory is only of marginally more use than the TasMAP. However this Directory will be especially useful with the names of streets as I return northwards and walk in and through the suburbs in the later part of this Stage 3 walk.

The most useful mapping and tracking information comes from the Google earth map of the area (which was also useful to see tracks on Gellibrand Point in Stage 2) – although the name Trywork Point is not recorded and does not appear on their map (Note that Trywork Point and some other landmarks are indicated on the TasMAP).  The best that Google can offer is Droughty Point Road. From there I moved the map westward until I found the T junction with Tranmere Rd and Oceana Drive – this intersection is the bus stop from where I will start walking.

Walking south, the bitumen road peters out and the tracks across the land are variously strong and faint on the Google earth map. With this limited information, finding my way will be an experimental process.

Years ago friend Je and I walked from the end of Tranmere Road across some of this land. However, I remember that we encountered stout almost impassable fences. This memory makes me wonder what I will find now, and how easy the access to Trywork Point will be. I look forward to my ongoing discovery of the land besides this wonderful Derwent River.


Stage 2 on 4/9/2014 Shelly Beach Email 12 of 14

By 11.40 am (only 2½ hours since stepping off the bus) I had taken the trail around Gellibrand Point and south onto the northern end of the narrow sand-based Shelly Beach. Crunching underfoot, millions of sun-bleached shells shattered further. Large empty oyster shells everywhere. Their whites contrasted strongly with the golden dry-brown colours of the sandstone rocks.

The water hardly moved in or out.  Quiet. Calm.

Different schools of 5 inch long fishlings darted from the clear shallows into slightly deeper water.  The bank of sand beneath the Bay was very shallow and I suspect a swimmer might need to wade out quite a distance before being able to lie down and cover themselves comfortably with water. Out a little way in the bay, and like small mirrors, flashes of silver ovals lifted from the water’s surface when slightly larger fish came up for air. Or were they leaping with joy. Perhaps the fishlings that I disturbed when my feet vibrated the ground sending them scurrying for deeper and hopefully safer water, were a delicious meal for the larger fish.

The succulent Pigface with its bright pink flowers grew at the bottom of the sandy cliffs. Were the layers of shells in the cliff strata, remnants of aboriginal middens or simply an older beach level? Was I seeing the shells of the Late Pleistocene?

Sand can be dangerous because, when packed, it doesn’t usually have any structural integrity. Everywhere, I saw crumbling cliffs as a testament to a perpetually ravaging process.  Throughout my walk, on the western beaches and now on this eastern beach of the peninsula, all the sandy cliffs showed erosion and recent falls.  It was clear to me that walking close to the edges on top could lead to a mini landslide if you were unlucky. I feel confident that walking at the bottom of the sandy cliffs poses no risk if you walk nearer to the water’s edge.

20140904_114726

By midday, I had walked to a fence two thirds the way along this long beach.  This fence across the sand to the water of Ralph’s Bay marked one track back towards Opossum Bay.  Because a couple of new groups of older school children were now enjoying a drum playing class on the beach with their teachers near this fence, I decided to walk along the beach further.  Never let it be said that I was a distraction to their lessons!

20140904_115559

Five minutes’ walk past the fence, in the distance was a line of boulders across the sand from the grasses to the Bay.

 20140904_120341

These rocks became my lunch time pit stop while rich brown hawks and protective plover birds whirled nearby.

Looking back where I had walked, the long Shelly Beach stretched into the almost unseeable distance.

20140904_121324

My map informed me that Icehouse Bluff marked the southern end of Shelly Beach. 

Around 12.20 pm I was packed and on my way to the Bluff following in the footsteps of a strolling couple and their dog. We met as they were returning and I asked what they knew about the history of the Icehouse or the Bluff’s name.  Unfortunately, this remains a puzzle to us all.

The advantage of meeting these lovely locals was that I learnt the Bluff was private property and that no access would be possible – so I didn’t waste time looking for tracks up the slopes. We talked about the celebrity locals who have a house at Opossum Bay. I am led to believe that these include Brian Ritchie (MONA) who I thought I saw filling his car with petrol during my Stage 1 walk, Damon Thomas the Lord Mayor of Hobart, Gordon Brown well known heritage artefact collector and television personality, and John Cook who was the last lighthouse keeper for Tasmania’s last two manned light houses (Maatsuyker, Australia’s most southerly lighthouse and later at Cape Bruny).  Quite frankly I imagine everyone who lives on this peaceful South Arm peninsula will have interesting stories to tell and will be celebrities in their own worlds.

Stage 2 on 4/9/2014 Onwards to Gellibrand Point Email 10 of 14

My journey continued up a hill where I recognised two track options; one inside a fence line, and another outside the fence at the top of the cliffs on the side of the Derwent River. I took the track outside the fence (I watched the following children and they were evenly divided between the inner and outer tracks- obviously their teachers thought the outer track to be safe), and at the top of the hill there was an opening to step through the fence and return to a 4 wheel drive track.

20140904_105455

The air was clear. The day was warming up. The views in every direction were sensational. One of those experiences that makes me so happy to be alive.

20140904_105300

The photo above looks across part of the northern end of that part of the Mary Ann Bay, and via the Derwent River, looks towards Hobart city suburbs and Mount Wellington.

Not far away I walked past a pile of broken old convict bricks.

20140904_105102

Gellibrand Point at the northern most point of the South Arm peninsula was the destination for Stage 2 of the walk.

I found the shape of this headland was blunt and rectangular so that there was no hint of a ‘point’. So it was a little difficult to say I had reached the exact spot representing the end of the second stage of my walk along the Derwent River edge. Across the watery opening into the large Ralph’s Bay I could see the goal for Stage 3 of the walk: Trywork Point. This headland is situated south of the suburb of Tranmere, and north of the South Arm peninsula.

20140904_110320

In the photo above, you are looking at Trywork Point across the water.

The photo below was taken from my lunchtime vantage point looking across Ralph’s Bay towards the mound in the distance over the water on the left hand side; this is Trywork Point.

20140904_121302

The Tasman Bridge, which provides the main city crossing between the eastern and western shores of Hobart, shimmered in the distance. Mt Wellington with spots in crevices of hard white ice left over from two or three weeks ago of heavy snow, was majestic.

I wandered along the headland until, between the track and a smattering of Casuarina trees near the water line, I spotted some sandstone boulders that looked perfect as resting spots; the first I had seen. By 11.15 I had rested, eaten a snack for morning tea, and set off again up to and onto the track that extends back to Opossum Bay via the eastern side of the peninsula.

Stage 2 on 4/9/2014 William Gellibrand’s burial Vault Email 9 of 14

Shortly after his arrival, in the 1820s William Gellibrand built a home using cedar with sandstone brick foundations, on Arm End. Marshall and Townsend claim the house was built in two parts consisting of nine rooms with stables located in the trees nearby (it is worth noting that the clearing of the land in this northern end of the peninsula was so thorough and complete that the numbers of trees could probably now be counted on two hands. Currently, the rolling hills are expanses of a variety of clumpy weeds. Open. Exposed. Desolate. The photo of weeds below was taken closer to the Communications tower however it is not atypical of other parts of this peninsula. Adding to the sense of barrenness is the frequent evidence of bandicoots digging across this large reserve. It is worth noting that a regeneration program is underway and so I would expect that the landscape will change its character in the coming years.)

20140904_101005

A visitor to William Gellibrand’s house, Miss Jane Mortimer recalled that every morning after breakfast, William went to dig his own burial vault located just below the house at the top of the dunes beneath She Oaks overlooking Mary Ann Bay. Apparently, he liked to spend sunny afternoons sitting on it and reading.

The land at Arm End remained in the Gellibrand family with the lease controlled by George Henry Blake Gellibrand who lived at ‘Terra Linna’. Young Christopher Calvert leased the land and lived in the house until he retired. There was an auction in 1914 of goods and chattels including animals. The homestead quickly fell into disrepair, was vandalised and eventually burnt down.

 I almost missed seeing the vault as I strolled along the track. The saviour was an information sign installed above the bank at the northern end of Mary Ann Bay beach. The sign informed me that not only was William buried in the vault, but also interred were two of his grandsons who had been members of the Parliament – Thomas and Walter Gellibrand. William Gellibrand died ‘after an illness of acute pain and suffering which he bore with Christian submission and resignation’ on 27 September 1840 (almost exactly 174 years ago) aged 75.

The sign refers to comments by a Mrs Ruby who ‘described the vault as having three shelves of stone more likely collected from the shoreline of Ralph’s Bay’.

The vault is located close by and downhill from the sign. Visitors are urged not to walk down and further degrade the collapsing dune. Thanks to the local land care group, it was very easy to see the vault from near the sign at the top because the surrounding vegetation had been cleared over the edge.

20140904_104535 

I left this remarkable site at 10.50 am as I could hear the school children coming along the track for their own experience.

Stage 2 on 4/9/2014 Travelling towards the South Arm peninsula Email 2 of 14

For people with lives normally immersed in the big cities of the world, travelling this route to Opossum Bay will be full of surprises.

Hobart is a capital city yet, after not many minutes of travelling, the bus passes through bush land from time to time, before coming out into clusters of developing real estate. Springing up around many corners, the landscape is meshed with strips of dark bitumen. These cul de sacs and neighbourhood streets are usually featured with white concrete lengths of soon-to-be driveways into soon-to-be built houses on blocks cleared of all vegetation. These new suburbs represent the interest in having and the will to live in your own home – even if it means a 20 minute or so travel time to the city. We know that by the standards of other capital cities around Australia and the world that such travel times are but a blink of time.  The easy accessibility to the centre of the city is a great reason to live in suburban Hobart.

As usual the bus travelled through the suburb of Rokeby. I was eager for another view of Ralph’s Bay remembering its sparkling crisp deep blue expanse when I travelled this way for Stage 1 of the walk. This time the colours were different however, despite the sun shining. Perhaps it was the high level wispy cirrus clouds that filtered the light and affected the colour of Ralph’s Bay on this journey. This time, when travelling the streets at the top of Rokeby, the spread of water was coloured a warmer tone of greys and pale greens. The Bay looked benign and neutral, and was all together welcoming. Further on in the journey, I passed the mud flats at the Lauderdale site of the Bay. The tide was in further than previously and covered most of the mud. I couldn’t help but think how time makes small differences in our world – it is only two weeks since I was travelling here on route for the first walk and, at that time, acres of mud flats were on show.

What else did I see during this bus trip?  Glossy dew on lawns. White blossom on fruit trees. Pink blossom. A well-painted graffiti wall, following a colourful display of clever mosaics in the suburb Clarendon Vale.  Road signs with the symbol of a horse with rider warning of the additional ‘traffic’ which the road might share. Paddocks with grazing horses. Horseboxes. White fences. As the bus started on the road across the isthmus to the South Arm peninsula one sign with a stylised image of a Pied Oyster Catcher bird indicated travellers should be aware that these birds may want to walk across the road from time to time.  Later, on the return to Hobart journey, I noted perhaps 50 Black Oyster Catcher birds resting as a large family, on the sandy edge of Ralph’s Bay near the sign.  They were not in the least put out by the rattling of the passing bus. 

Fort Direction memories

My posting about Fort Direction prompted the following response from a friend:

“Well in 1961, and I can’t find any reference to it on Google, the Fort Direction site was lent to the Methodist youth whatever to have an Easter camp and I was there.  I can remember the chapel and the kitchens etc and my friend Sue and I wandered far and wide and kept coming across rolled barbwire fences that kept us in rather than let us out.  We ventured as far as Roaring Beach which impressed me no end.  Christian youth camps in the 50s and early 60s were the hotbed for discussion especially philosophy and I can remember one of the groups that camp, discussing objectivity and subjectivity.  Lots of the brightest students went to these camps.

And this is when I first saw Ralph’s Bay as we travelled at dusk in a bus to South Arm and Fort Direction.  Over the years I thought this image of the tidal flats, so different from my experience on the north west coast of Tasmania, was something in my imagination. So when I had moved to live in Hobart and was exploring to buy a place, imagine my excitement when I found that very image and it was la de dardle!!!!”  (Or, as the map lists it, Lauderdale)

22 Aug 2014 Leaving South Arm and heading home, and final thoughts – Posting 8 of 8

On the return journey towards Hobart, the bus deviated via large mudflats into the town of Cremorne adding 5 minutes to the trip, then it dropped me at a Lauderdale bus stop for transfer to another bus (because the Opossum Bay bus terminates at Lauderdale) approximately 5 minutes later (with his two way communication, the bus driver alerted the other driver there was a transferring passenger to be collected). Once on the Lauderdale bus, the trip towards Hobart deviated through the suburb of Oakdowns and so a further 5 minutes was added to the journey. After the bussing and the walking I was home in Bellerive at 3.20pm.

In this series of blogs for the first walk stage, I have provided approximate times for various sections of my walk as an indication only. I am short legged and plod slowly (and towards the end I felt I was shuffling like an old man). If you are tall and can happily stride long steps faster, then my walk will not be sufficient to fill the time between buses.  In fact some speedy walkers may be able to continue through the Opossum Bay community and walk to the end of Gellibrand Point, the most western tip of this piece of land before Ralph’s Bay makes its inlet.  My next walk will be designed to complete that section, and then I should be able to advise as to whether fitting it all into 5 hours is possible for the able.

Since it is unlikely anyone else will have my success if they turn up at the gate of Fort Direction and get driven through the site, the only general public approach is to walk along Fort Beach having walked most of Blessington Road.  Based on the information I recorded, I suggest one way on this route from the set down bus stop to the Lone Pine Memorial will take an hour if you take time to enjoy the views and click photographs. Add the half hour return walk between Cape Deliverance and Cape Direction with its gun placement bunker and the whole excursion takes approximately 2 ½ hours.  As an alternative, you could spice it up by jumping the shore rocks like a goat, from South Arm to Fort Beach. I would guess another hour could be added to the duration of the walk.

I noted that the tide was going out while I walked, and that the high tide merged with the dune verges in places on Fort Beach. It made me think that on a high tide, this route might be impassable. In such a circumstance and if you had made the special trip and your heart was set on a beach walk, the expanses of the South Arm beach with their outstanding views, old pines shadowing parts of the dunes, and soft roaring Casuarina trees, would make a very attractive substitute.  You might be lucky, as I was, to see a giant fresh squid washed onto the beach being enjoyed by immature grey feathered winged large Gulls.

Many of our native birds are various shades of black and brown but we also have an array of colourful specimens. During my walk, the sun brought out not only the musical black and white Magpies, the hard cawing jet black Crows, but also plump pink and grey Galahs feasting on the ground, Mr Blue Wren flitting in and out of the shadows, a glorious Mr Robin with his red breast, and a flock of multi-coloured Rosella parrots.

My guess is that I walked around 10-12 kms including getting to the start and then continuing on.  But how much of the 249km length of the Derwent River have I covered? About 7kms. A great start! A memorable day. A very positive experience.

22 Aug 2014 Continuing to South Arm – Posting 2 of 8

After leaving Rokeby, we weren’t back on the main road long before the bus deviated again; this time through the suburb of Clarendon Vale. There is a significant building here. As some sort of counterpoint to the modern Catholic Church next to the John Paul II Catholic School, down the road before reaching the main road you can see a heritage quality, beautiful old sandstone church.  This is St Matthews Anglican Church which comes with a reasonable size cemetery full of ancient headstones.  Would be worth a stop-over on a future excursion.

Here’s some additional information to whet your appetite.

From http://members.optusnet.com.au/~tacplaci/rokeby.html#r13, “The first service in the area was conducted by the Chaplain of Van Diemen’s Land, the Reverend Robert Knopwood in 1821, and he agitated for a Church for many years. Whilst the first burial, that of Catherine Chipman, took place in 1827, the foundation stone for the church was laid in 1840 after Knopwood’s death (1838). Knopwood is buried here, in a plain coffin with no name plate. The Church and its fittings and furnishings, the churchyard and burial ground are on the Register of the National Estate.”

From http://www.ohta.org.au/organs/organs/Rokeby.html you can gather further information including photos by John Maidment of the simple but striking building (see below) – all the more so because there are no other grandiose buildings nearby. 


Once the bus was back on the main road, we passed the suburb of Oakdowns on the left and the Tasmanian Police Academy on the right (the latter overlooking a glorious panorama of Ralph’s Bay) before taking a bend in the road and coasting down into the main drag of Lauderdale, a seaside suburb.  The tide across Ralph’s Bay was out leaving the rippled mudflats visible.

With suburban build-up left behind after Lauderdale, the scenery became entirely rural, except for the short line of houses in the shopless village of Sandford.